The following explains how to add a new Dual Channel Receiver to a Genius Hub.

If you have an existing Dual Channel Receiver it will need to be excluded from any other network before it is connected to a Genius Hub.
Power on the Dual Channel Receiver* within 2 meters (line of sight) of the Genius Hub. You may need to move the Genius Hub closer to the Dual Channel Receiver, the hub needs to be both plugged into the power and also the internet, you can temporarily wire the Dual Channel Receiver to a plug and short piece of flex so you can power on the Dual Channel Receiver next to the Genius Hub.
*It is recommended that this is done by an electrician/heating engineer.

Now the hub needs to get ready to add the device.
On the app tap on Menu, then Settings and then Devices. Now tap on 'Include device' and follow the prompts on the app.Open the cover on the right-hand side of the Dual Channel Receiver to reveal 4 buttons.
Press & hold the 2 white buttons behind the cover.
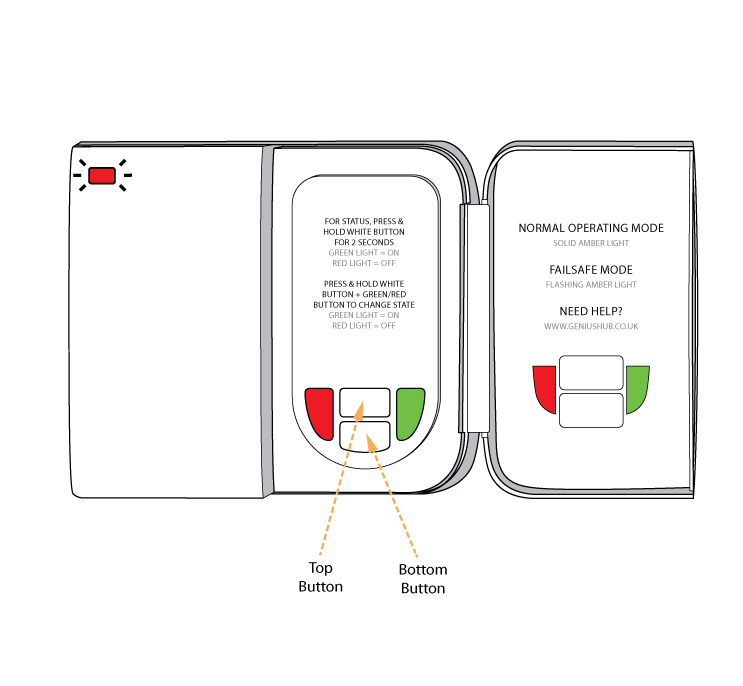
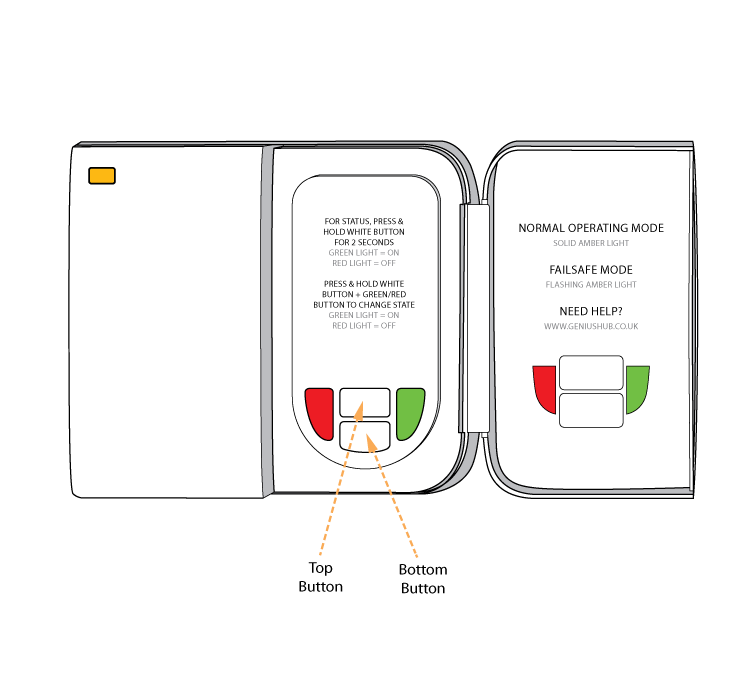
The flashing red light turns to a solid amber light when the device has included successfully.
On success, the Dual Channel Receiver has been assigned a number, write this number on the side of the device.
The success or failure of the inclusion will be displayed on the app.*** Verification Test to ensure new node ID & hash = DCR hash ***
Install the Dual Channel Receiver and wire it in place if it is not already.
Assign Channel 1 to a zone (the top button. See Chapter 13 of the Manual for information on assigning your device/channel to a zone.*** Assign channel 1 and channel 2 to zones ***
Assign Channel 2 to a zone (the top button. See Chapter 13 of the Manual for information on assigning your device/channel to a zone.