
In Timer mode, you can set up a 7-day schedule to control the heating in a zone. You set up 'heating periods' to suit your needs, each with a start time, end time and temperature. At the start of each heating period (or earlier, if pre-heat is enabled), the Genius Hub will turn on the heating in the zone. Once the zone has reached the set temperature, the system will maintain that temperature until the end of the heating period.
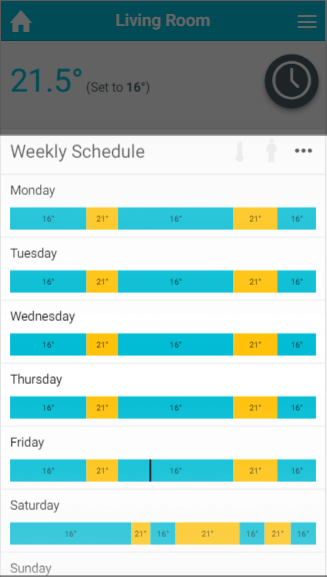
The main difference between Timer mode in Radiator, Underfloor or Hot Water Temperature zones and Timer mode in On/Off zones is that you can set a temperature for these types of zone. In On/Off zones you can only set periods when the zone is on or off.
If you have enabled Sense Mode (a Beta feature), it replaces Timer mode in the mode selector. See the 'Sense Mode' chapter.
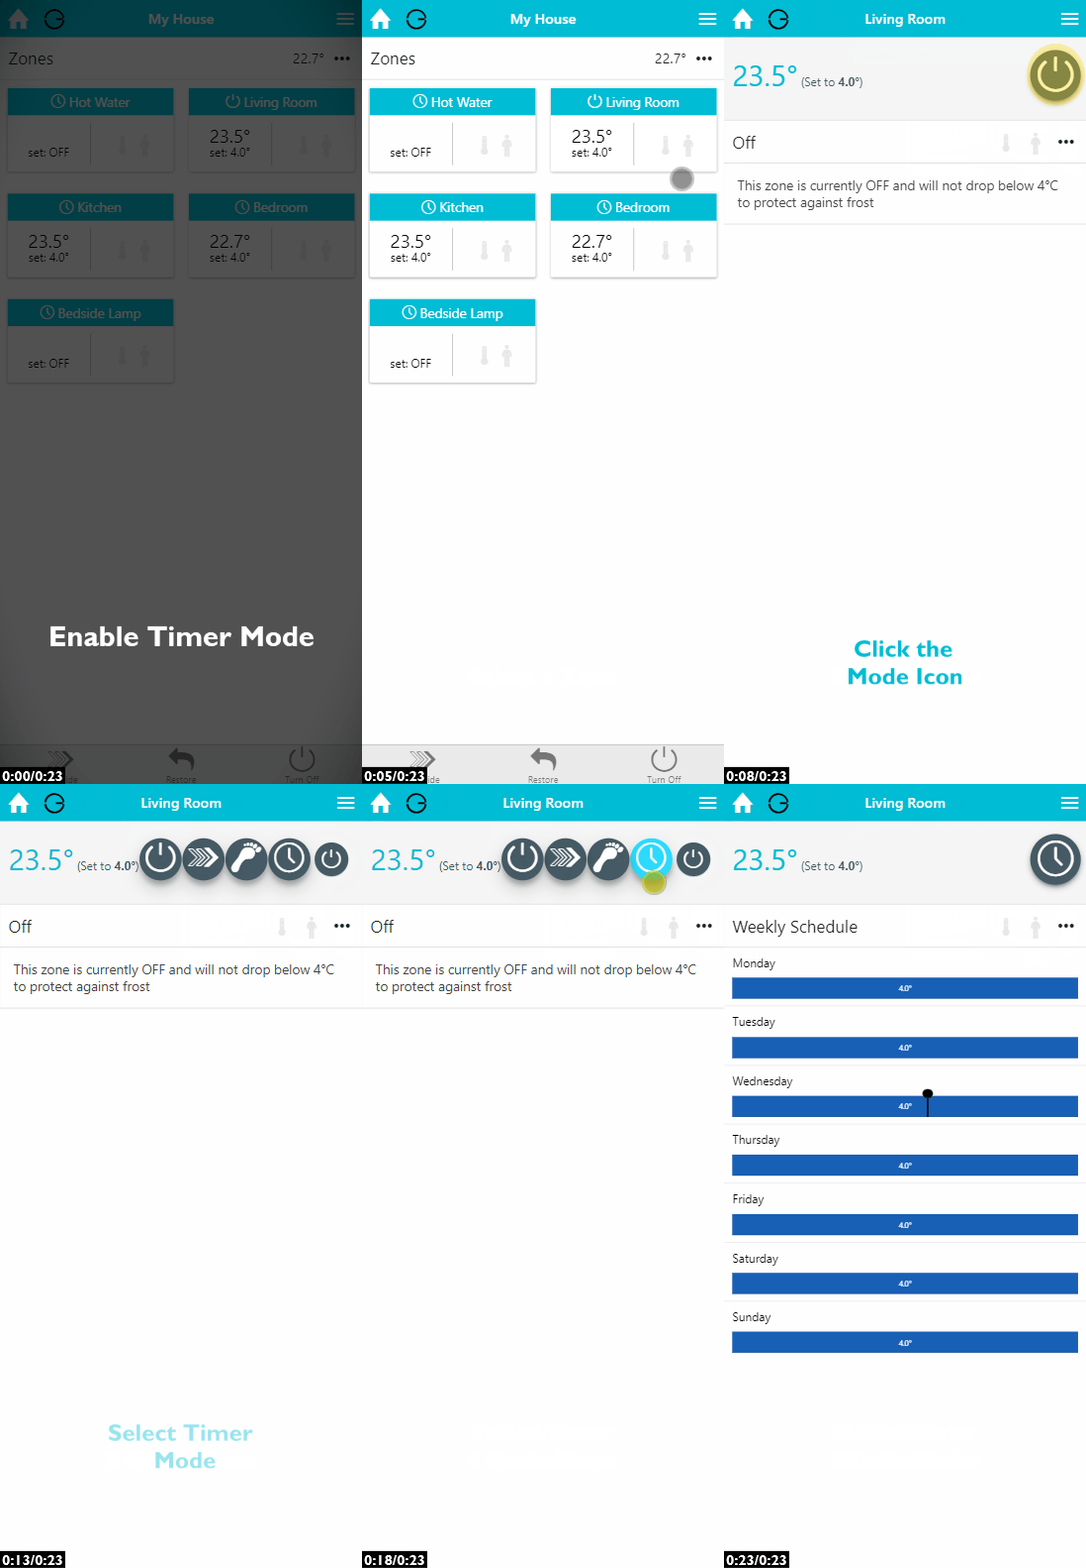
To view the schedule for any zone:
-
From the My House page, click on the zone you wish to view.
-
Ensure the zone is in Timer mode.
To view a day's schedule in more detail, click on that day. This will show the details of the schedule, including the default temperature and a list of the heating periods.
|
Demonstration |
|---|
|
How to set up your schedule
Adding a heating period
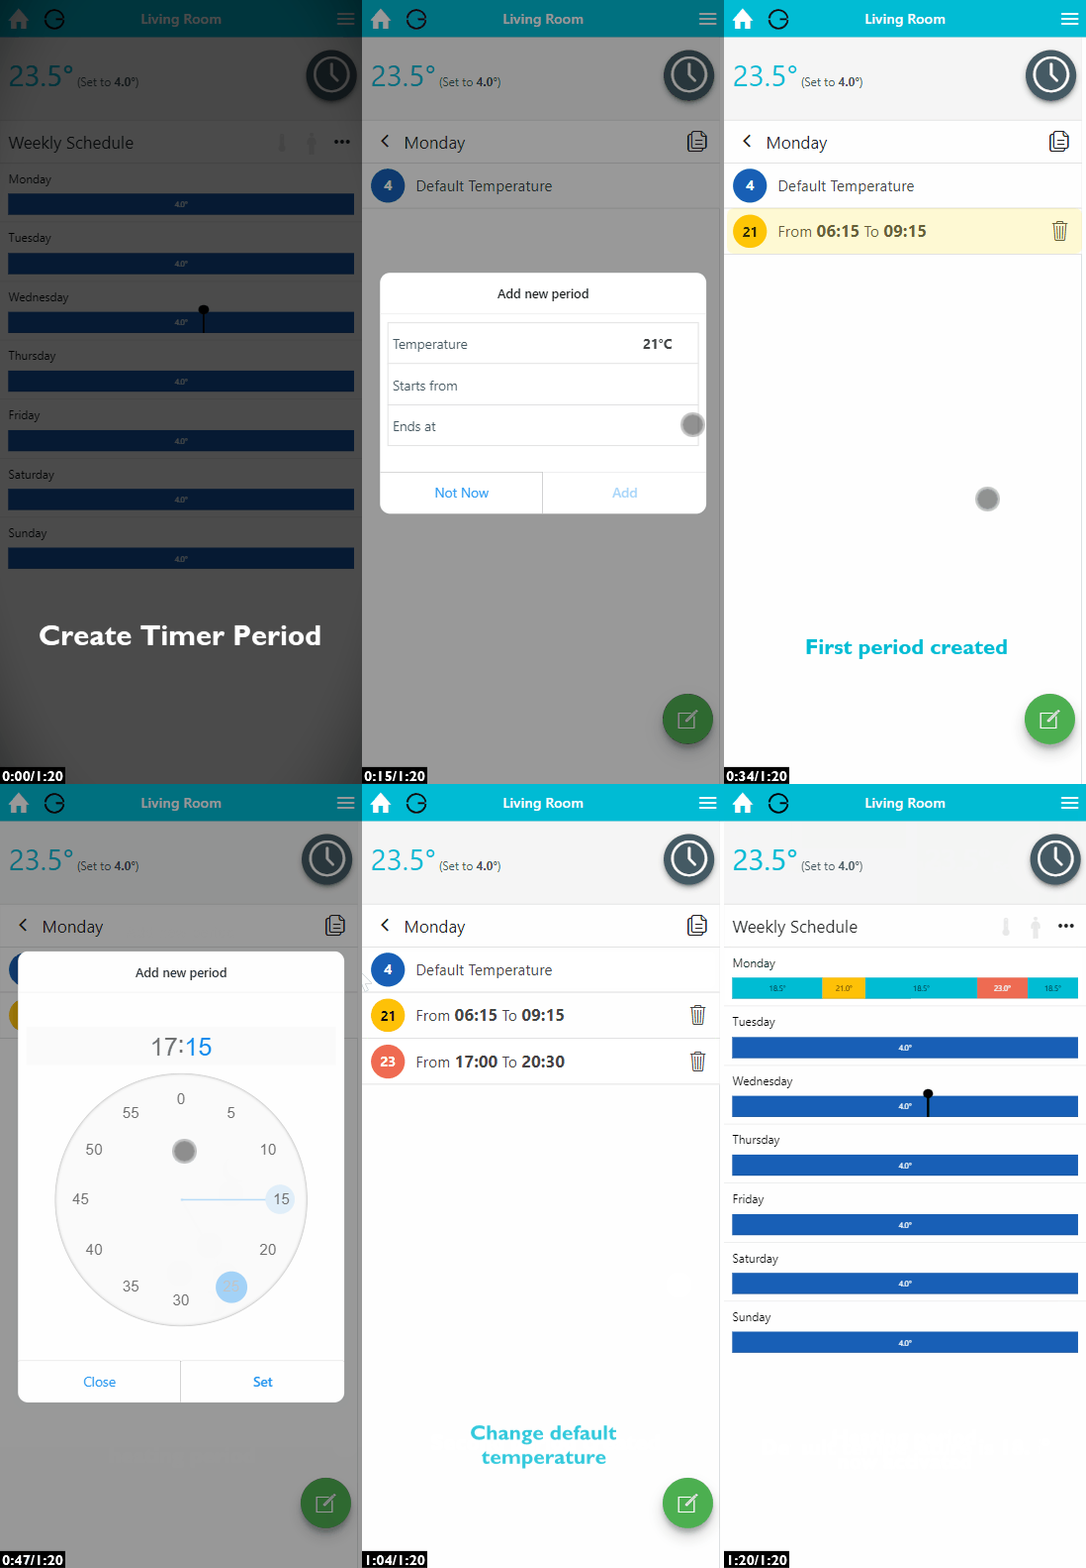
With the Genius Hub system you can set as many heating periods as you need throughout the day.
Each heating period must be at least 5 minutes long. There is no limit on the number of heating periods you can create.
|
Demonstration |
|---|
|
To add a heating period:
-
From the My House page, click on the zone you wish to schedule.
-
Change the zone to Timer mode.
-
Click on the day you want to add a heating period to.
-
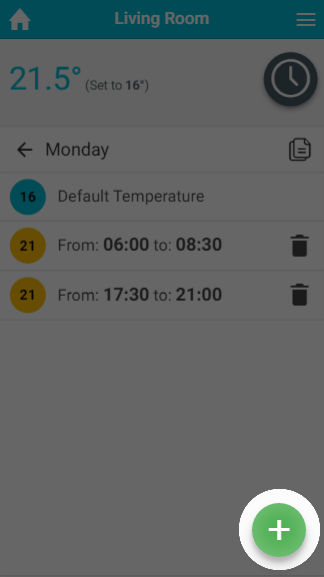
Click the floating add heating period button at the bottom-right of the page.
-
To select the temperature, drag the slider to the temperature you want, then click Set.
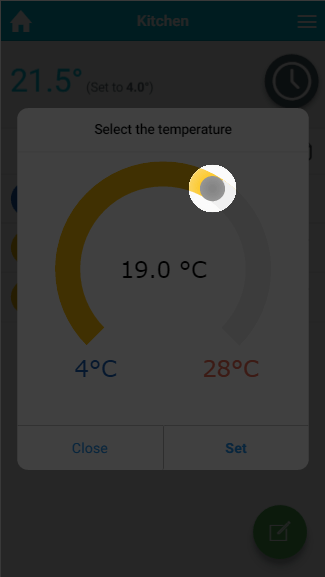
-
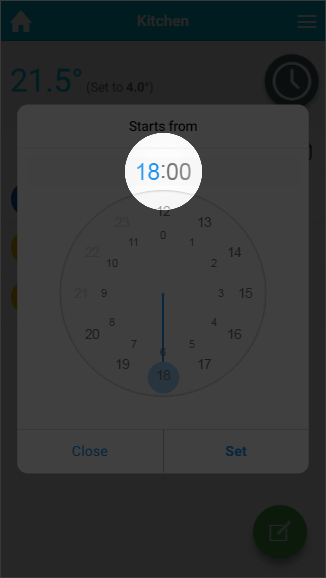
Select when the heating period should begin, by first clicking on the hour the heating period will begin.
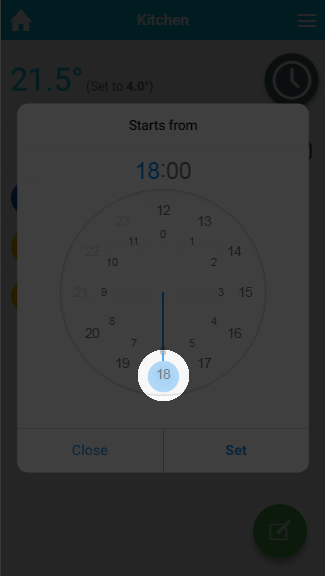
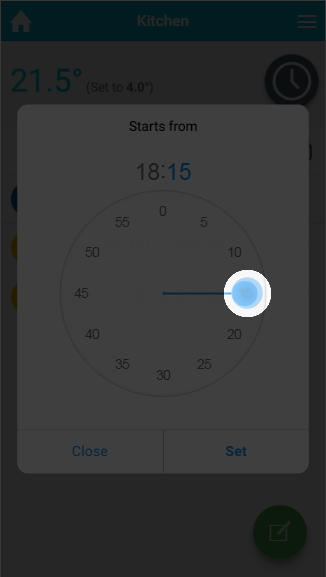
Next, click on the minutes the heating period should begin, followed by Set.
-
Select when the heating period should finish, in the same way.
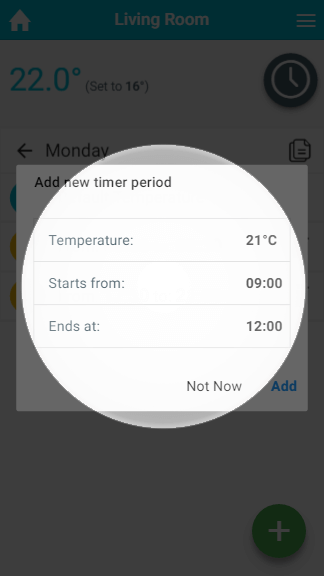
-
Click OK.
If you want to change the hour after you have selected it, click on the hours in the selected time.
For an On/Off zone you only need to select the start and end time of the On period you are creating.
Editing a heating period
|
Demonstration |
|---|
|
|
If your routine changes or the temperature in a zone is not right for you, you can easily change a heating period.
To change a heating period:
-
From the My House page, click on the zone you wish to edit.
-
Ensure the zone is in Timer mode.
-
Click on the day you want to change the schedule of.
-
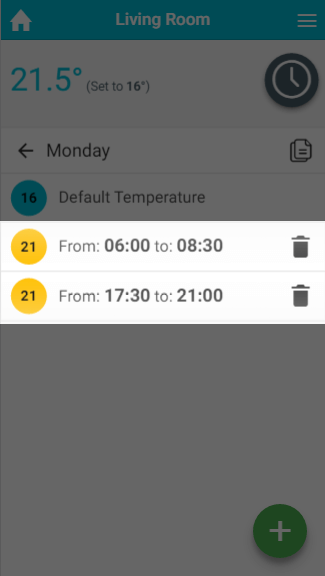
Click on the heating period you want to change.
-
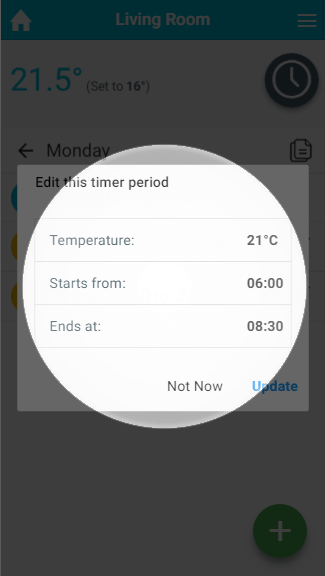
Click on the option you want to change, e.g. the end time.
-
Change the option to its new setting.
-
Click OK.
Removing a heating period
If your routine has changed significantly, you may wish to delete a heating period.
To remove a heating period:
-
From the My House page, click on the zone you wish to edit.
-
Ensure the zone is in Timer mode.
-
Click on the day you want to change the schedule of.
-
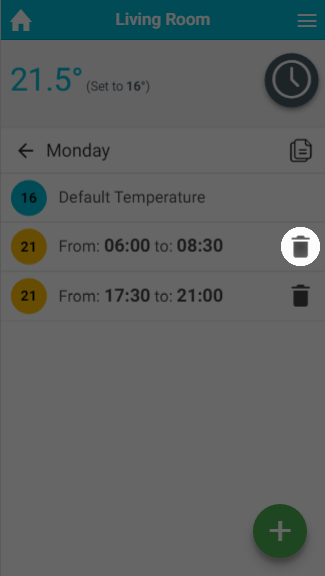
Next to the heating period you no longer want, click on the 'Bin' icon.
-
In the confirmation dialog, click 'Delete'.
A deleted heating period cannot be recovered, so make sure you are deleting the right one.
Default temperature
The default temperature is the temperature the zone controls to outside of your heating periods. Setting a sensible default temperature stops the zone cooling down too far, so you don't return to a cold house and the zone doesn't take a long time to heat up again.
The default temperature can be set for each day in each zone. To do this for heating zones:
-
From the My House page, click on the zone you wish to edit.
-
Ensure the zone is in Timer mode.
-
Click on the day you want to change the default temperature for.
-
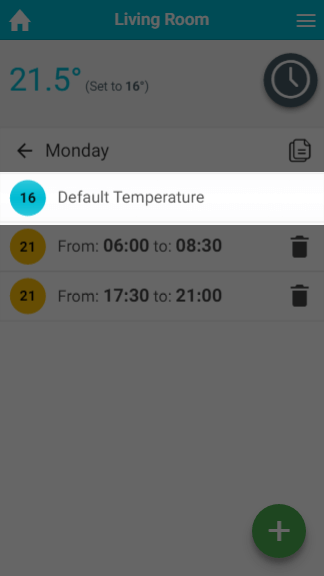
Click on the Default temperature entry at the top of the list of heating periods.
-
Change the default temperature and click Set.
Default temperatures are especially important for Underfloor zones, which can take a number of hours to reach the desired temperature. A floor has a large thermal mass, so if it gets too cold it takes much longer to warm up again than a metal radiator. We recommend setting a default temperature no more than 4°C below the normal heating temperature (for example, if your heating periods are set to 21°C, set a default of at least 17°C).
We also recommend using pre-heat for Underfloor zones.
There is no configurable default setting for On/Off zones. These zones are off by default and are always on during their heating periods.
Copy to Another Day
|
Demonstration |
|---|
|
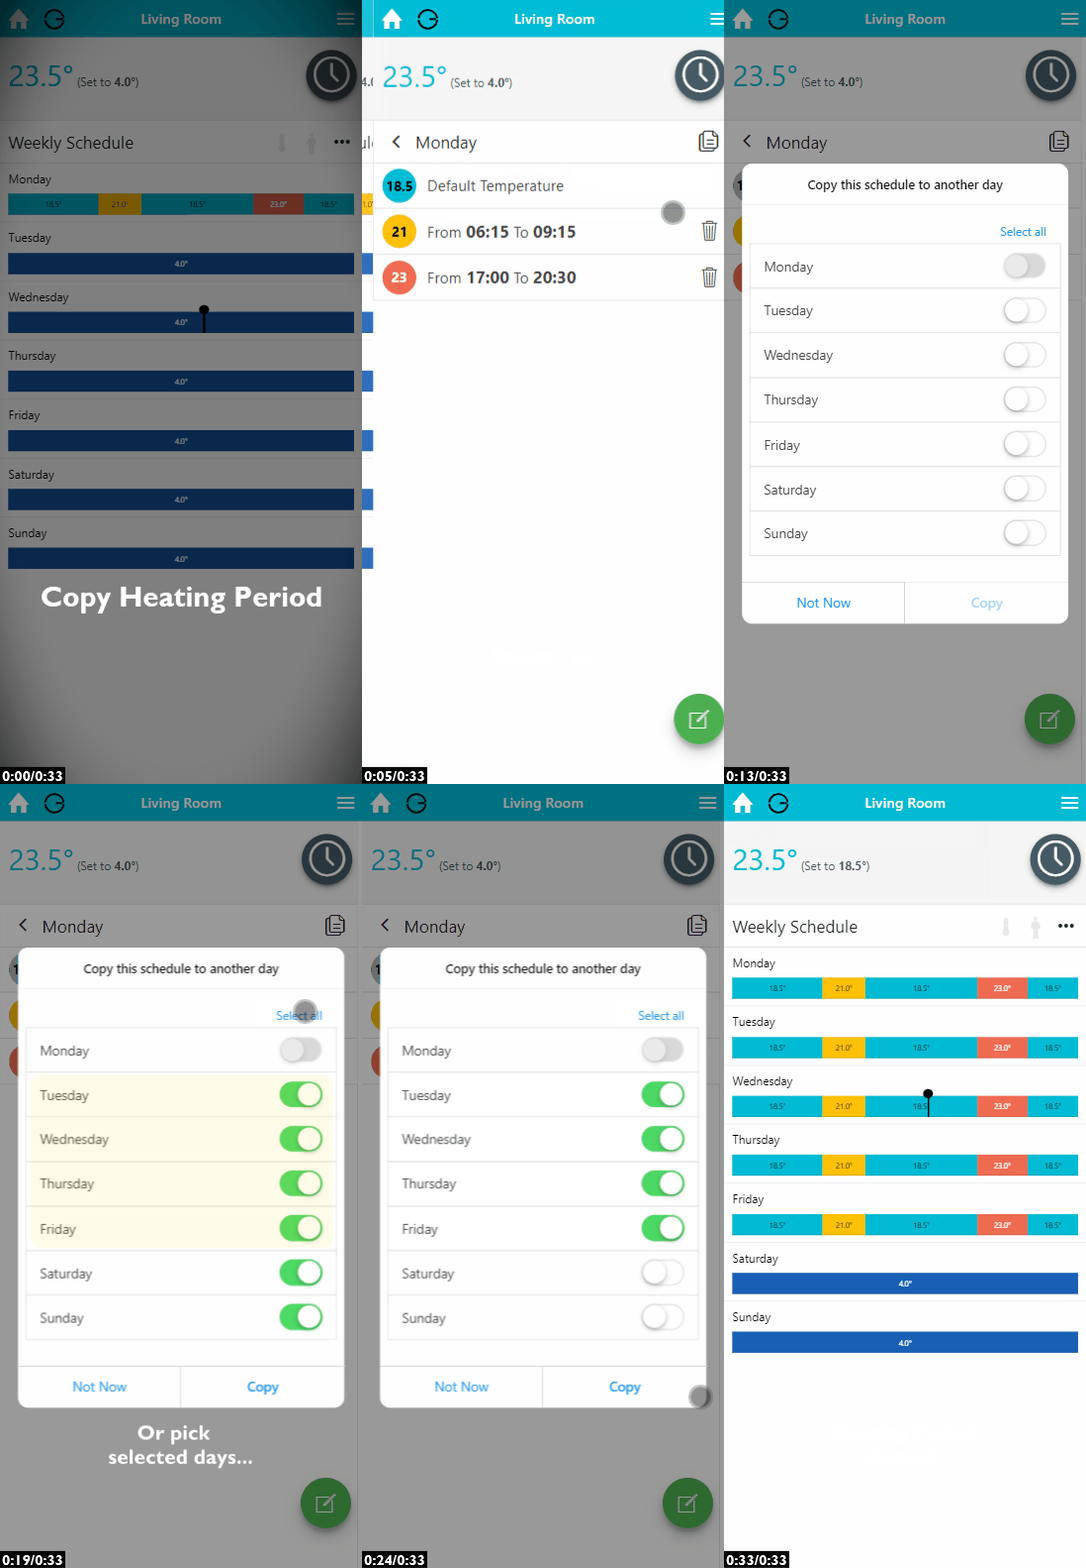
Once you have set up the schedule for one day, you can easily copy it to other days. This is useful if you have a regular routine, such as working the same hours on several days of the week.
To copy the schedule from one day to another:
-
From the My House page, click on the zone you wish to view.
-
Ensure the zone is in Timer mode.
-
Click on the day you want to copy the schedule from.
-
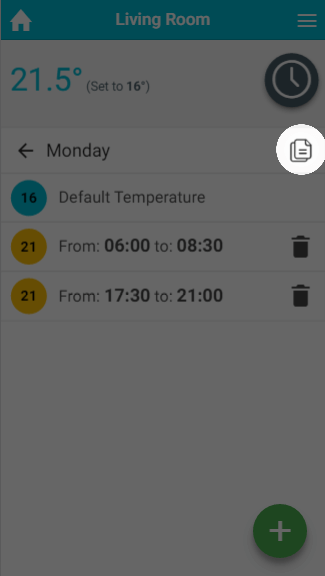
Click on the copy icon at the top right of the page, underneath the mode selector.
-
Select the days to copy the schedule to.
-
Click 'Copy'.
Advanced options
Copy to Another Zone
|
Demonstration |
|---|
|
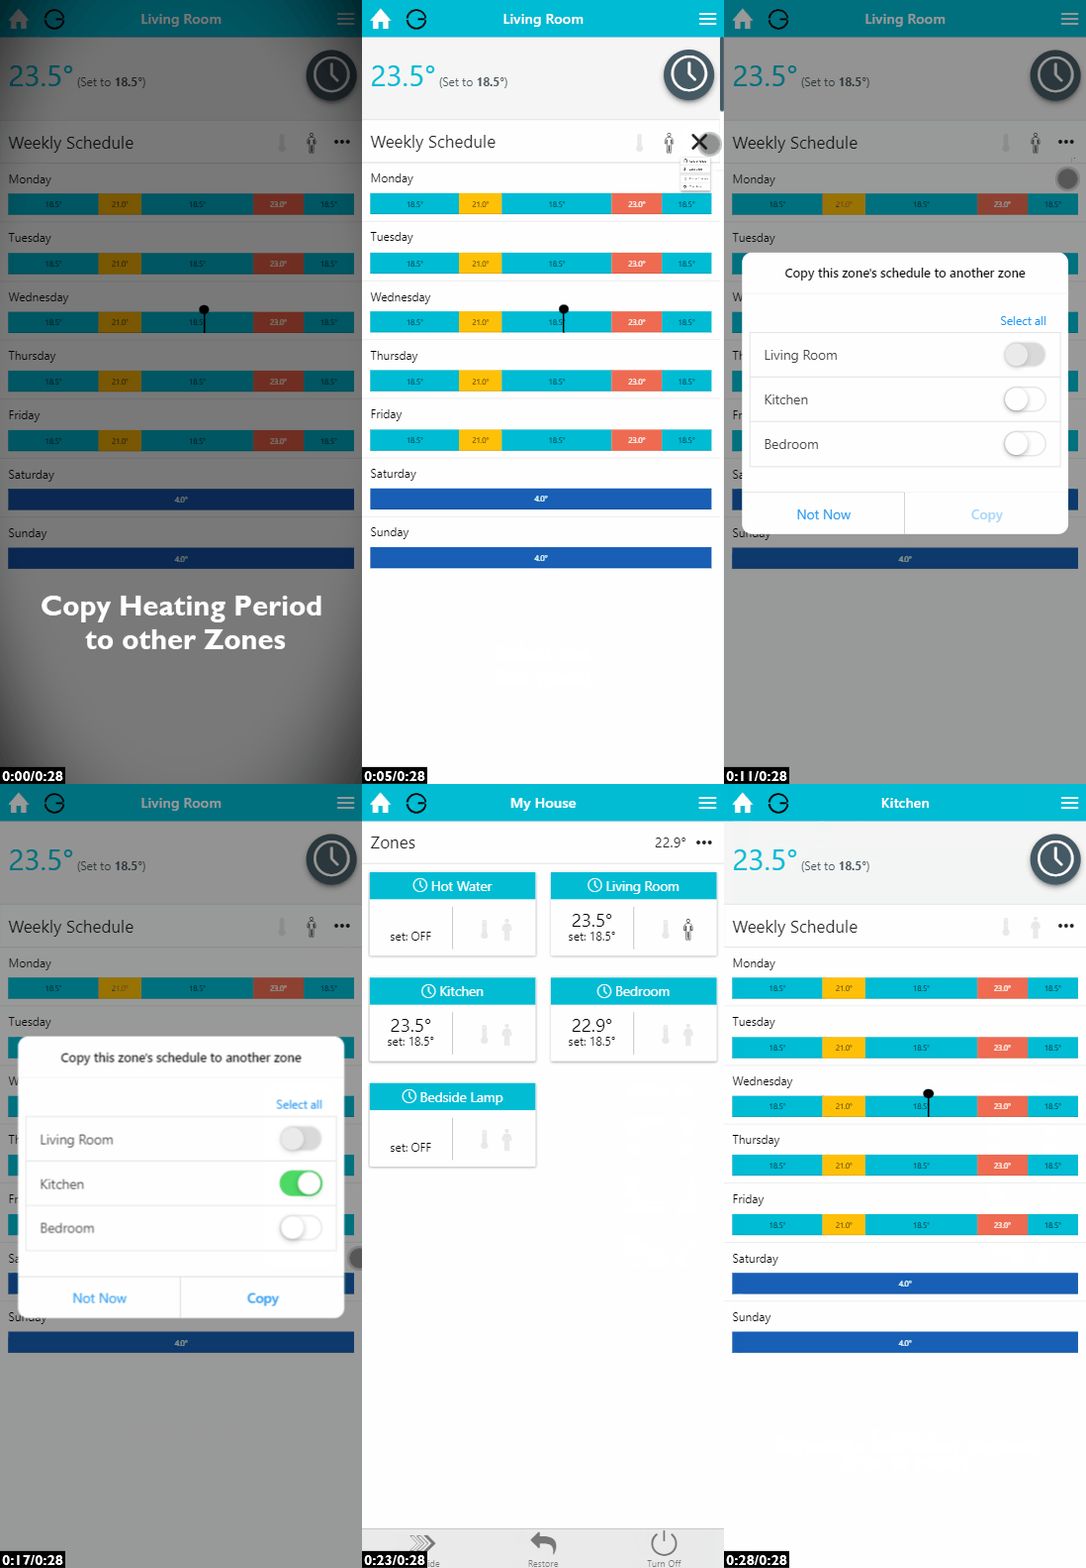
After setting up the schedule for one zone, you may find it easier to copy that schedule to another zone and then adjust it, for example if you have several bedrooms in the property.
To copy the schedule from one zone to another:
-
From the My House page, click on the zone you wish to copy the schedule from.
-
Ensure the zone is in Timer mode.
-
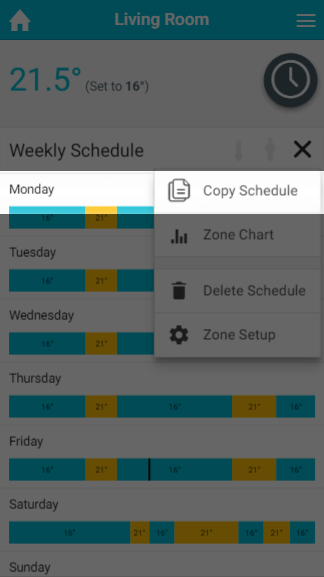
Click on the zone sub-menu and click 'Copy Schedule'.
-
Select the zones you want to copy this zone's schedule to.
-
Click 'Copy'.
-
Copying the schedule to another zone will not automatically change the other zones into Timer mode. You need to set each zone to the mode you want individually.
-
You can only copy schedules to zones with similar temperature ranges (e.g. you cannot copy a Radiator schedule to a Hot Water Temperature zone).
A schedule cannot be recovered once it is overwritten, so make sure you select the right zone(s).
Delete Schedule
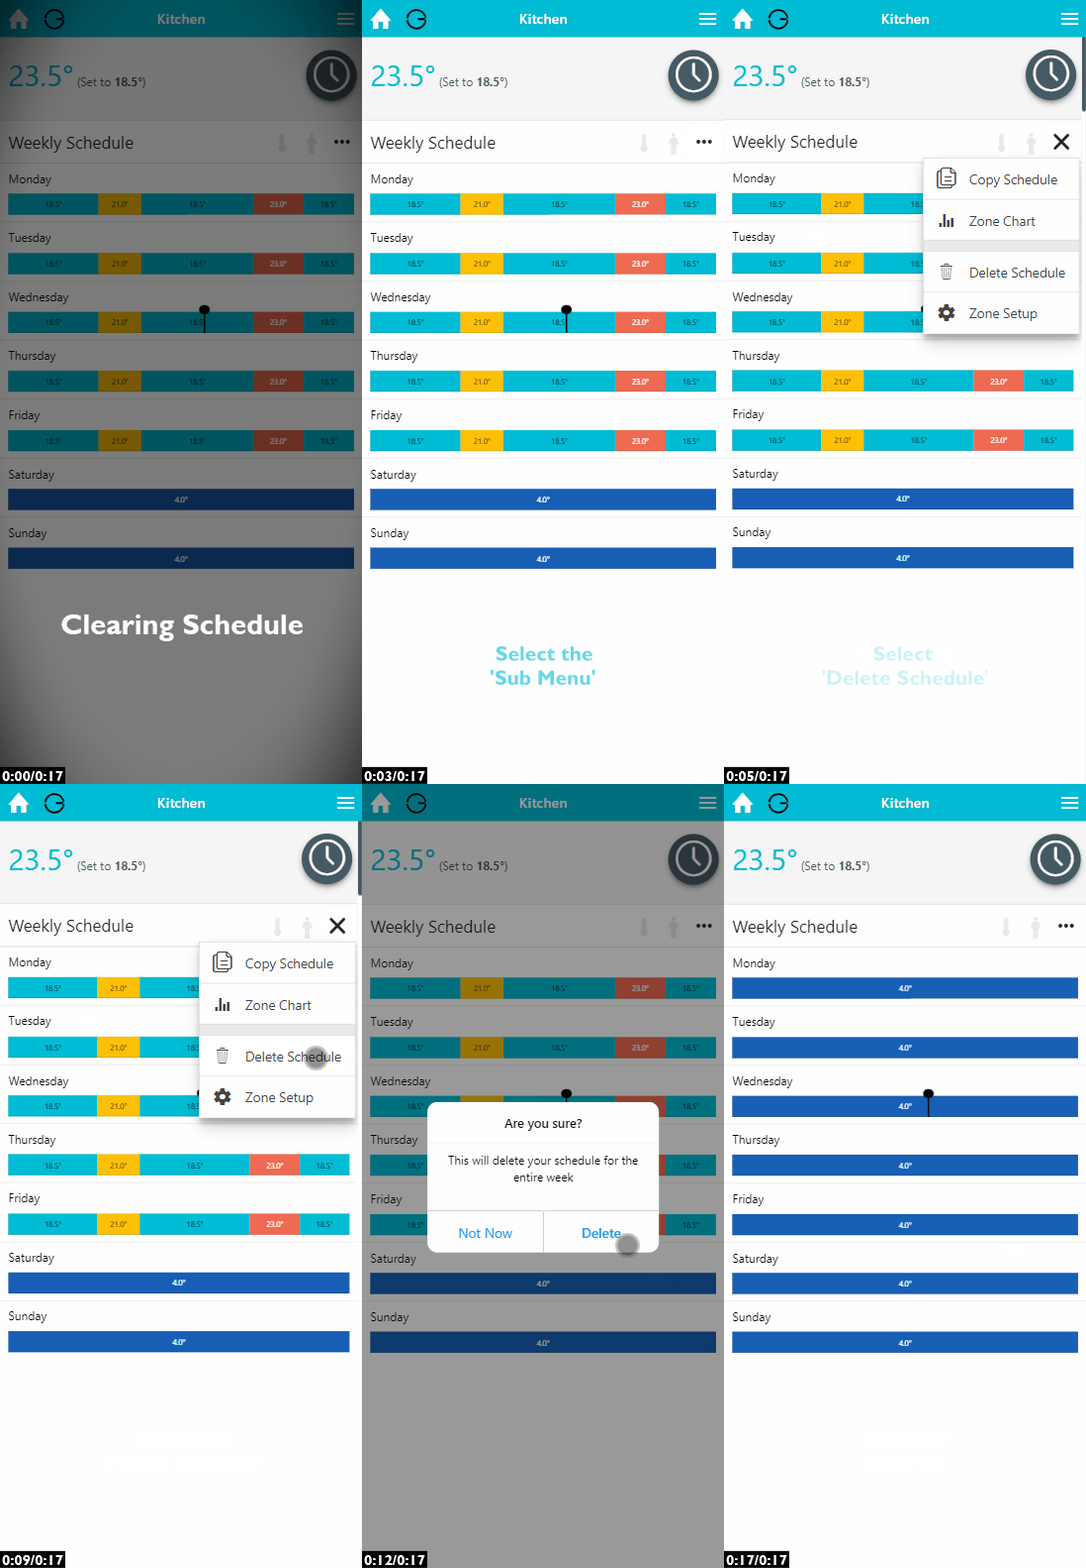
If your routine has changed significantly, it may be easier to clear the whole schedule for a zone and start again by adding new heating periods.
|
Demonstration |
|---|
|
To delete the entire schedule for a zone:
-
From the My House page, click on the zone you wish to delete the schedule of.
-
Ensure the zone is in Timer mode.
-
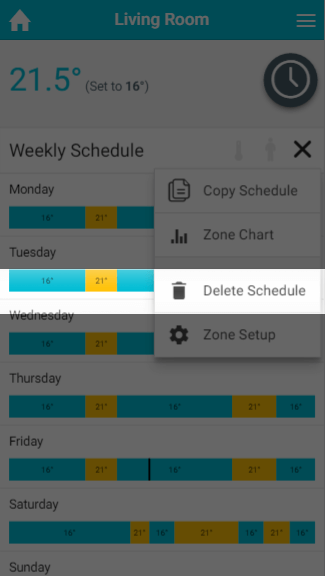
Click on the zone sub-menu and click 'Delete Schedule'.
-
In the confirmation dialog, click 'Delete'.
A schedule cannot be recovered once it is deleted, so make sure you have selected the right zone.
Pre-heating
Pre-heat works alongside your Timer schedule so that the zone is already warm at the start of each heating period. It is turned on from the Zone Setup.
-
If pre-heating is disabled: The system will start heating the zone at the start of each heating period, so the zone may be below temperature at the beginning of the period while it heats up.
-
If pre-heating is enabled: The system will calculate how long the zone takes to reach the set temperature and start heating that much earlier than the start of the heating period, so the zone is warm for the whole of the heating period.
To enable pre-heating, please see the 'Setup pages' chapter.