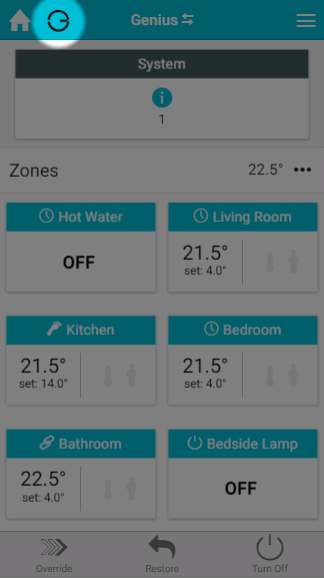
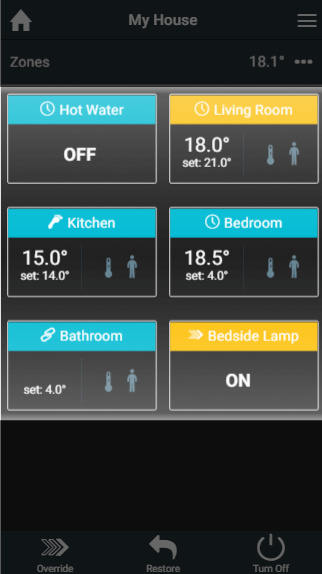
When you are logged in and have finished the tour, the first screen you will see is the My House page. This is an overview of your system and you can access any of your zones from this page.
- To access the schedule for any of your zones, click on the respective zone tile.
- To return to this page at any time, just click on the My House icon at the top-left of the screen.
Your zones
The tiles provide a quick summary of each of your zones:
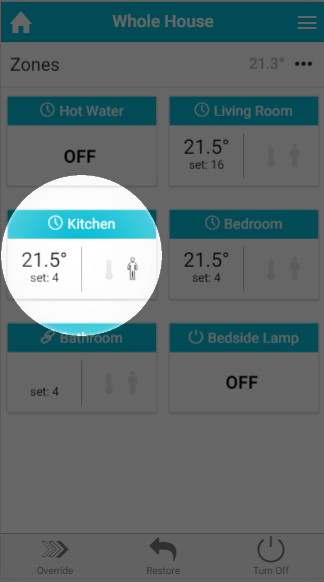
- When the tile is blue, the zone is up to temperature and is not calling for heat. When the tile is orange, the zone is trying to heat up and so calling for heat (or on if it is an On/Off room).
- The mode icon shows the current heating mode for the zone.
- The temperatures are made up of 2 sections:
- The measured temperature: This is the current temperature in the zone, and is displayed in any room where the devices in the zone feed the temperature back to the app (such as zones with a Room Sensor or Thermostat).
- The set temperature: The temperature the zone is currently controlling to.
- The pre-heat symbol will be lit up when the zone is heating due to the pre-heat settings. For more information on pre-heat, please see the 'Setup pages' chapter.
- The occupancy symbol shows when occupancy is detected in a zone. For more information on Footprint Mode, see the 'Footprint Mode' chapter.
- In On/Off rooms, only the current state of the devices in that room is displayed.
To view a zone in more detail, click on that zone's tile.
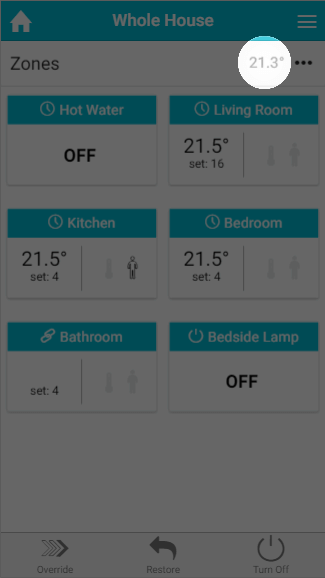
In the 'Zones' title bar is the My House temperature. This is the temperature measured by your House Thermostat, and is used as a backup temperature for a zone if the temperature sensing device stops communicating (e.g. if a Room Sensor has a flat battery).
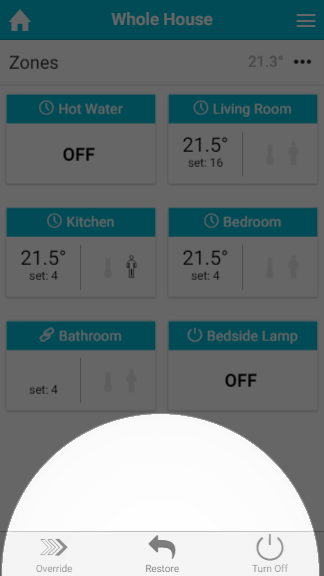
Quick actions
To carry out an action that which affects a number of zones you can use the quick actions which are located at the bottom of the screen. These actions do not affect On/Off type zones, to affect these zones go to the respective zone and change the mode to Override.
- Override: This allows you to override multiple rooms to the same temperature and to the same time, in one action. To override zones from the My House page:
- Select which zones you would like to override, then click Next. You can choose just one zone or multiple zones. To select all of the zones, click on the link at the top of the list.
- Select the temperature to you wish to set in the selected zones, and click Next. This temperature can be higher or lower than the schedules temperature in the zone, so you can use this feature to turn the heating off early if you are leaving the house earlier than usual.
- Choose the how long the override is to affect the selected zones, and click Finish. This can be set from just 5 minutes to 24 hours, and so can be used so give the room a boost on those colder days or turn the heating off if you are going out for the day.
- Restore: This action cancels either the Override or the Off action which is set in the zones and reverts the selected zones back to their previous mode. This means that if you turn your heating to 'Off' over the Summer, you can just click 'Restore' to put your heating back on for the Winter.
- Off: This action turns all of your heating zones (not On/Off type zones - such as Hot Water / Lamps / etc) to Off mode. Zones in this mode will not be affected by a manual override of the My House thermostat. If a zone is overridden from a device in the zone or from the app then after the override expires the zone will return to the mode it was in before (e.g. Timer, Sense or Footprint) and not return to off. Turning a zone off here can be thought of as 'off until' another action in the zone.
More information
Connection Icon
Next to the home icon in the header bar, is an icon to show the current connection status.
- G icon
- Everything is communicating as normal.
- This is what should be shown the majority of the time you are using the app.
- G icon with Amber spinner
- The app is currently attempting to sync the latest data.
- This is likely to be shown when the app is first launched, or clicked on after being minimised. The app will be refreshing the connection and data shown on the screen.
- To save data, many of the setup pages do not collect data on a regular interval, but instead only do it when a setting has been changed. If you are on a setup page for a long period of time, the icon may turn amber until the page is navigated away from.
- This may also be shown if you have poor signal and the data on the app may be out of date until the app re-establishes connection.
- G icon with Red cross
- The connection has dropped and changes on the app will not affect your heating until the connection is established.
- This is likely to occur when either your Hub or Device does not have a working internet connection. Check that the device you using to view the app has a working internet connection. If so, you may need to power-cycle the Genius Hub.
- If you are using the local/IP connection from an Android/iOS device, the Hub can no longer be found on the expected IP address for the network.
Zone list
On a tablet or computer all of the zones are displayed as a list on the left hand side of the screen. These give you a quick way to navigate between your zones and they also show a quick summary similar to the tiles:

- Heating indicator: shows whether the zone is requesting heat.
- If the indicator is blue, the zone is up to temperature and not calling for heat.
- If the indicator is orange, the zone is trying to heat up and so calling for heat (or on if it is an On/Off room).
- Mode icon: shows the current heating mode for the zone.
- Measured temperature: for zones with a measured temperature, the current temperature of the zone is displayed on the zone list.
- Pre-heat symbol: this will be lit up when the zone is heating due to the pre-heat settings. For more information on pre-heat, please see the Setup page chapter.
- Occupancy symbol: shows when occupancy is detected in a zone. For more information on what the various states of the symbol are, see the The zone pages.
Main menu
From the My House or any of the zone pages you can access the main menu found as button at the top right of the app.
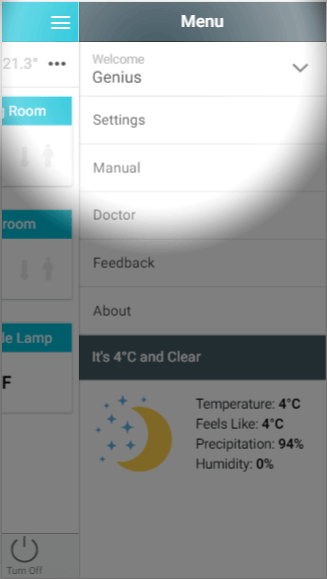
From the menu you can access the following options:
- Your username: For more information, see the chapter 'Making the system your own'.
- Settings: View information and settings about devices on your system
- Manual: Access this manual from within the app.
- Feedback: For more information, see the chapter 'Troubleshooting and issues'.
- About: Contains technical information about the platform the device is being ran on and the version of the app you are using.
- Weather: Shows the current weather data for the registered post code. This is the same weather data that is used by the app for some features and updates every few hours.
System tile
If there is an error or notification on the system, such as a device has a low battery a new tile will appear at the top of the My House page to inform you of this.
There are 3 levels of notification in the System Tile:
- Error: these are for when part of the system is no longer working, such as a device has lost communication due to a dead battery.
- Warning; These are lower priority messages, such as warnings that a battery is low and will run out soon.
- Information: These are notifications, such as for new software updates for your Genius Hub.
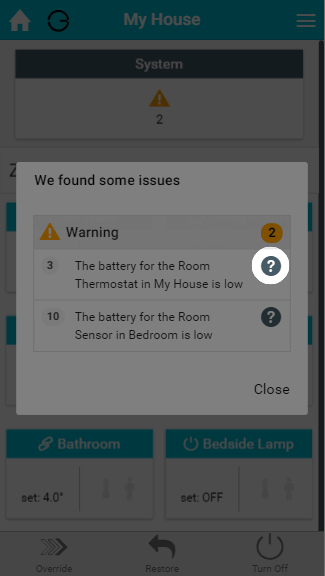
To resolve the issue:
- Click on the Systems tile and it will list any outstanding issues for your system.
- Click on the
 to the right of the notification, which will send you to the Doctor to help guide you through how to fix the problem.
My House sub-menu
On the right hand side of the 'Zones' title bar is the My House sub-menu. Many pages have their own sub-menu and these provide options to customise how information is displayed on the page or access other pages related to the one you are currently viewing.
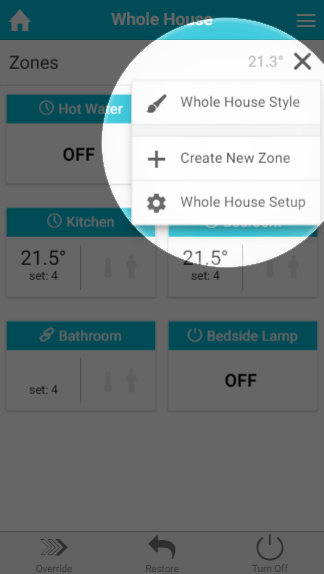
The options on the My House sub-menu are:
- My House Style
- Create New Zone
- My House Setup
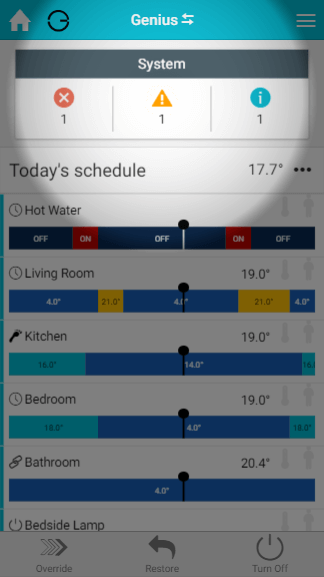
My House Style
This option select how your zones are displayed on the My House page between tiles (as seen above) and Timerbars.

- Timerbars show the today's schedule for each of the rooms, along with the same information as you see when using tiles, such as the measured temperature, mode icon and whether occupancy is detected in this zone. The vertical line to the left hand side of the timerbar is the indicator as to whether the zone is calling for heat.
- To see more detail about any of your zones, click on the respective row.
- The current time, and therefore which part of the schedule is active, is indicated by the vertical line on the timerbar, which travels left to right as the day progresses.
Especially on larger devices it is not always clear when the heating periods are set for by merely glancing at the timerbars. You can add dividers to the timerbars to seperate the day into small sections. To switch these indicators on:
- Click on the Main Menu
- Select Settings
- Click on Interface
- Turn on the setting 'Show details'
On mobile devices, the dividers show every 6 hours. On larger screens there are dividers every hour with more noticeable lines every 6 hours.
When Timerbars have been selected, any overrides are displayed as an overlay on top of the schedule of the mode the app will return to once the override expires. The previous schedule is washed out to make viewing the override more noticeable.

Create New Zone
To expand your system to control more devices, you'll start by creating a new zone to add the devices to.
To create a new zone:
- Click on the 'Create New Zone' in the My House sub-menu
- Follow the instructions in displayed on screen
An explanation of each type of control is displayed under the drop-down box to help you make the right choice.
Only 1 zone per room is required, so a room with 2 Genius Radiator Valves only needs 1 zone to be created on the app and both radiators will be controlled to the same schedule.
My House Setup
Setup pages allow you to change the configuration of a zone, such as its name, what devices are assigned to it and enable extra features such as pre-heating. For more information, please see the chapter on the Setup Pages.
Customising the Interface
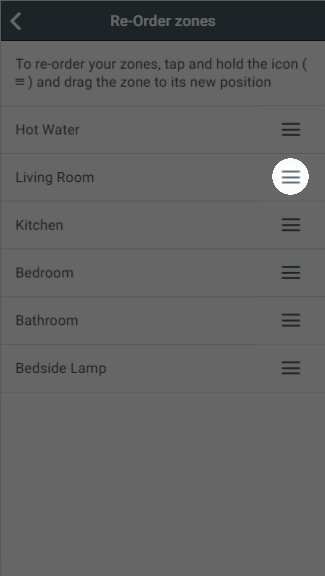
Re-ordering your zones
You can change the order of the zones displayed on your My House page and on the Zone list (for larger screens) by:
- Click on the Main Menu
- Select Settings
- Choose Interface
- Tap on 'Re-Order zones'
- Click and hold on the move icon on the right hand side of the row for the zone you want to move and drag the zone to its new position in the list
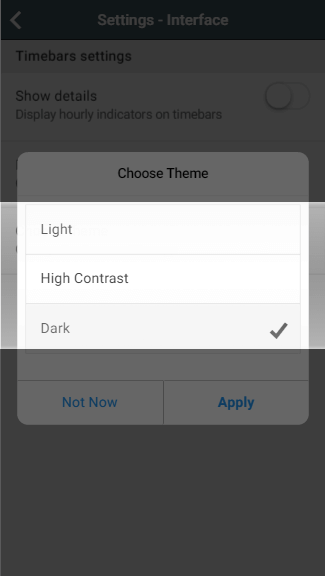
Change the theme
Whilst all of the screenshots have been taken with the 'Light' theme, it is easy to change the colour scheme of the app either for personal preference or to make it easier to read by choosing the 'High Contrast' setting.
To change the theme of the app:
- Click on the Main Menu
- Select Settings
- Choose Interface
- Tap on 'Choose theme'
- Select the theme from list