Radiator Valve (WRV-C)
Valve Hidden Offset | This offset should be applied when a Genius Radiator Valve is not controlling the correct temperature. In these cases, the radiators will not be controlled to the correct temperatures and so may turn fully off whilst the zone is still orange on the app (calling for heat). This could be due to a number of reasons such as:
In these cases, the Genius Radiator Valve should be offset to control to a higher or lower temperature, as required.
The Hub will check that the new offset has been accepted by the Genius Radiator Valve |
Valve Responsiveness | If the valve receives its setpoint, but the radiator does not begin to get warm for a long time, you can change the following setting to make the valve think that it is installed onto a radiator that is too small for the room, so, therefore, it needs to open faster to heat the room. Once the room is up to temperature then it controls the temperature, but there is a chance that the room may overshoot the target temperature if the radiator is too large for the room.
What do the different settings mean:
|
Enable Valve Shutoff | When enabled, Genius Radiator Valves in this zone will be 4°C whenever the room is not requesting heat to ensure the radiator does not heat up.
The advantage of sending 4°C to the Genius Radiator Valves when a zone is not heating up, is that the radiator will not take any hot water from the system when the room-measured temperature is above the set temperature - in cases when the valve experiences a different temperature to another temperature measuring device in the room, leaving the heated water to those zones which need it most. The disadvantage is it will reduce battery life as the radiator valve will be running from open to fully closed more often, and it may be confusing to a user as to why the valve shows 4º when this is not part of the heating schedule. |
Radiator Valve (WRV-E)
Valve Hidden Offset | This offset should be applied when a Genius Radiator Valve is not controlling the correct temperature. In these cases, the radiators will not be controlled to the correct temperatures and so may turn fully off whilst the zone is still orange on the app (calling for heat). This could be due to a number of reasons such as:
In these cases, the Genius Radiator Valve should be offset to control to a higher or lower temperature, as required.
The Hub will check that the new offset has been accepted by the Genius Radiator Valve |
Valve Orientation | With our new Genius Radiator Valves (DA-WRV-E) the orientation of them is very important. For the previous valves (DA-WRV-C) this was not the case. In the UK the ‘standard’ and most common orientation of valves is vertically and at the bottom of the radiator. In this orientation, the part you turn to manually adjust the temperature in the room is at the top of the valve and the button with a dot on it (used to mount the Genius Radiator valve) is below the screen that displays the target temperature. If your Genius Valve is installed horizontally (or upside down under a radiator) it will underread the temperature in the room because it will be compensating for the heat coming from the pipework and the radiators when it should not be, and this causes the room to potentially overheat. How to correct the orientation of the Genius Radiator Valve:
The devices page will update with the ‘current setting’ should you move away from the Devices page and return to it afterwards |
Enable Valve Shutoff | When enabled, Genius Radiator Valves in this zone will be 4°C whenever the room is not requesting heat to ensure the radiator does not heat up.
The advantage of sending 4°C to the Genius Radiator Valves when a zone is not heating up, is that the radiator will not take any hot water from the system when the room-measured temperature is above the set temperature - in cases when the valve experiences a different temperature to another temperature measuring device in the room, leaving the heated water to those zones which need it most. The disadvantage is it will reduce battery life as the radiator valve will be running from open to fully closed more often, and it may be confusing to a user as to why the valve shows 4º when this is not part of the heating schedule. |
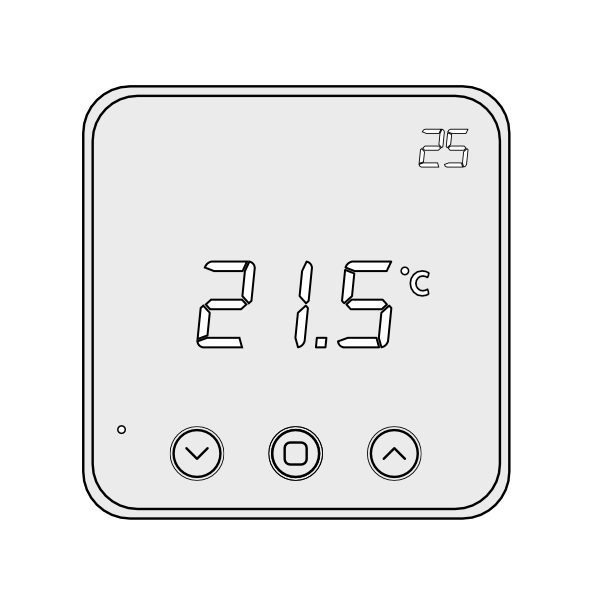
Wireless Room Thermostat (WRT-D)
Parental Lock (LOC) | All Genius Room Thermostats are shipped with the buttons on the front enabled. This is to allow the user in the room to adjust the temperature in the room (temporarily override the schedule set on the app). However, in some cases, you may want to disable these, such as in a child's playroom. When the controls are locked out, the screen will light up to show the measured & set temperatures, but the set temperature cannot be changed by the buttons on the front of the screen. The current temperature and schedule will still be configurable via the app.
How to unlock the controls
|
Temperature Offset | In some situations the Radiator Valves and Room Sensors can detect a different temperature from one another, for example, if the Room Sensor is placed on an external wall it will misread the temperature due to the cool wall. When this happens and it is not feasible to move the Room Sensor due to the layout of the room, the devices can be manually offset so they read the same temperature. To put an offset into a zone on the app:
NOTE: If you have a room in which the Room Sensor is misreading the temperature, resulting in the boiler running when the Radiator Valve has closed you, calculate the offset of this room:
|
Powered Room Thermostat (WRT-D)
LED Brightness | All Powered Room Thermostats are shipped with a default brightness. This has been chosen as a compromise between being able to clearly read it during the day, and it not being a significant light source at night. If installed in bedrooms, you may wish to reduce the brightness to help the occupant of the room sleep.
You can adjust brightness from a scale of 0% to 100% (0% = Darker / 100% = Brighter) |
Temperature Sensor Offset | This offset should be applied when a Genius Radiator Valve is not controlling the correct temperature. In these cases, the radiators will not be controlled to the correct temperatures and so may turn fully off whilst the zone is still orange on the app (calling for heat). This could be due to a number of reasons such as:
In these cases, the Powered Room Thermostat should be offset to control to a higher or lower temperature, as required.
The Hub will check that the new offset has been accepted by the Powered Room Thermostat |