
Not all heating systems are plumbed as a single heating circuit. Some have each floor of the property on a separate heating loop, or have more than one boiler heating different parts of the property. In these cases, the heating zones are grouped together using group zones.
A group zone works in a similar way to a linked (child) zone: it calls for heat whenever any of the zones in its group call for heat. For example, if a first-floor bedroom calls for heat, the group zone controlling the first-floor zone valve will open it, allowing hot water to flow through that circuit to reach the bedroom. In properties with separate heating loops or boilers, this means heat is only sent to the pipework that needs it, rather than heating all of the pipework every time a zone calls for heat.
Group zones are displayed on the My House page in a special tile at the top of the page, with a circular indicator for each group zone. Like the zone tiles and the zone list indicators, these indicators change colour to show when a zone in that group is calling for heat. To see which group zone is heating, click on the Groups tile to display a list of all of your group zones. On a computer, you can also hover over an indicator to display the group zone's name.
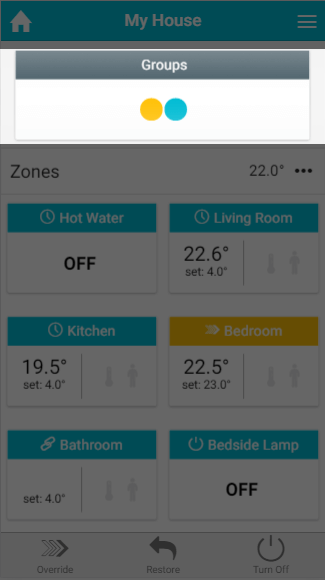
Group zones do not have a manual override option in their setup page.
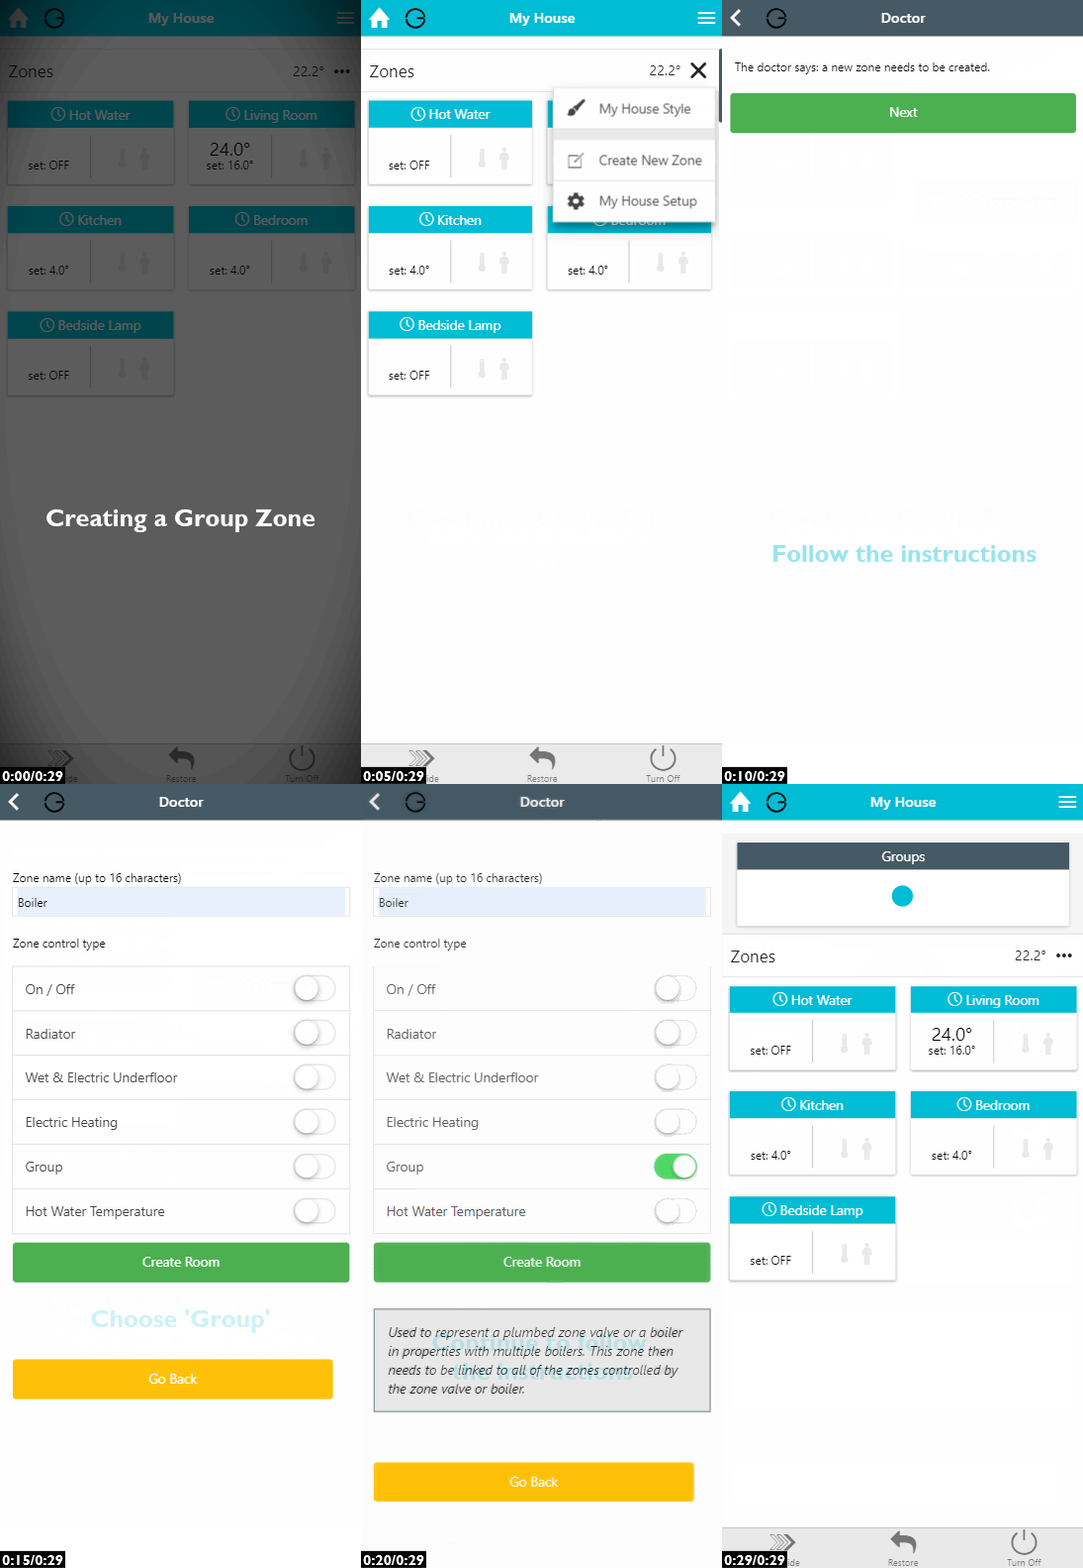
How to create a group zone
-
Click on 'Create New Zone' in the My House sub-menu.
-
Enter a name for the group zone and select the 'Group' zone type.
-
Click 'Create'.
-
In the new group zone's Group Setup, assign the receiver channel that controls the zone valve (or boiler) for that part of the property.
-
Add the zones that belong to the group, as described below.
How to add zones to a group
|
Demonstration |
|---|
|
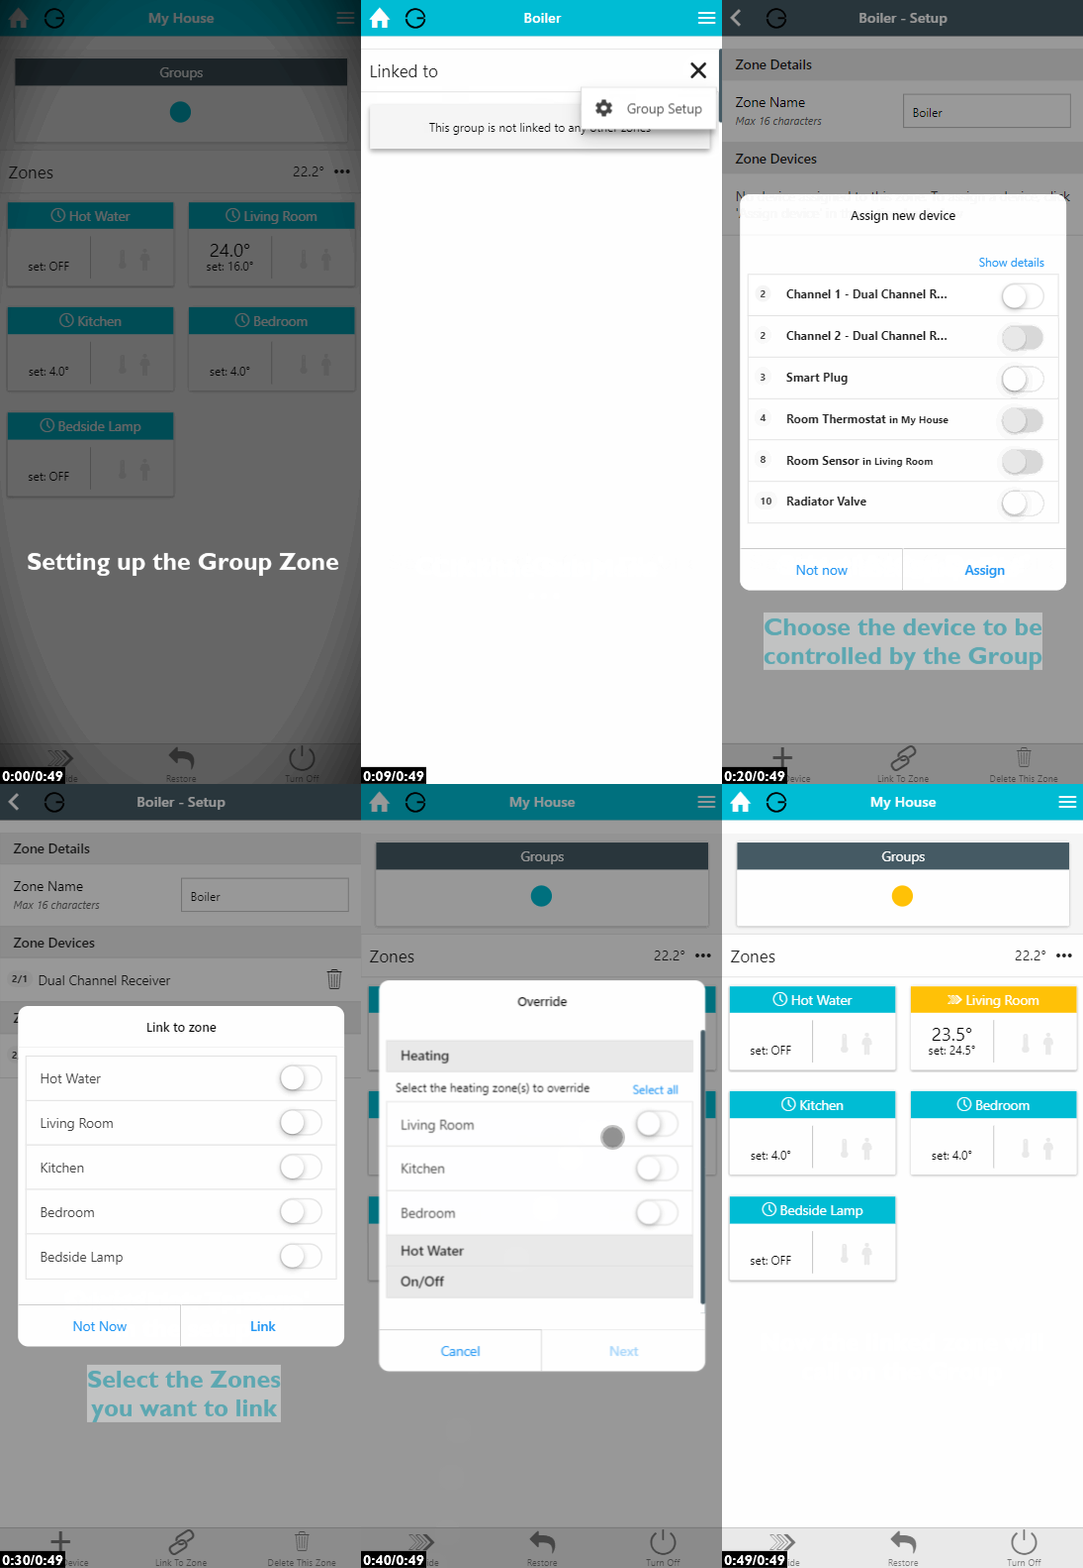
To add zones to a group zone:
-
From the My House page, click on the group zone you would like to change.
-
Click on the zone's sub-menu.
-
Click 'Group Setup'.
-
On the Quick Actions bar, click on 'Link to zone'.
-
Select the zone(s) that belong to this group.
-
Click 'Link'.
How to remove a zone from a group
|
Demonstration |
|---|
|
If you no longer want a zone to be part of a group:
-
From the My House page, click on the group zone you want to remove the zone from.
-
Click on the zone's sub-menu.
-
Click 'Group Setup'.
-
Scroll to the 'Linked to' section.
-
Click on the broken chain icon next to the zone you want to remove from the group.