As well as being very flexible in the level of control you can have using the Genius system, it is also very easy to expand the system if you decide you want to add to your system at a later date.
Creating a new zone
If you need to create a new zone to add the device to:
- Click on the 'Create New Zone' in the My House sub-menu.
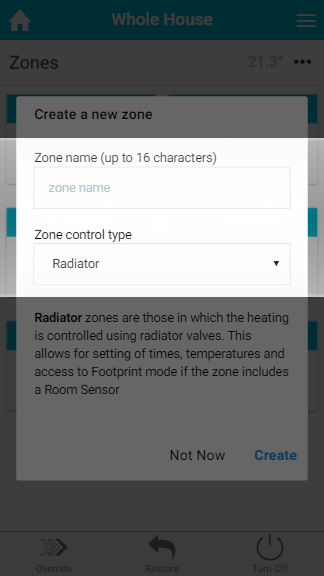
- Enter the name of the zone you are creating.
- Select the type of control you require, such as On/Off if you are adding a Smart Plug, or Radiator if you are controlling a new room with Genius Valves.
- Click 'Create'.
An explanation of each type of control is displayed under the drop-down box to help you choose the right type. |
 Add a device
To add a new device onto your system:
- From the My House page, click on the menu at the top right hand corner of the app.
- Click on Devices.
- Select 'Include Device' from the Quick Actions bar at the bottom of the screen.
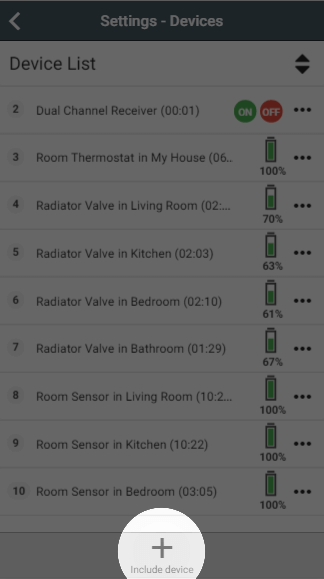
- Follow the on-screen instructions.
 Assign a device
Once the device is added, you will need to assign it to a zone:
- Click on the zone you want to add the device to.
- Click on the Zone sub-menu and Zone Setup.
- Click on 'Assign device'.
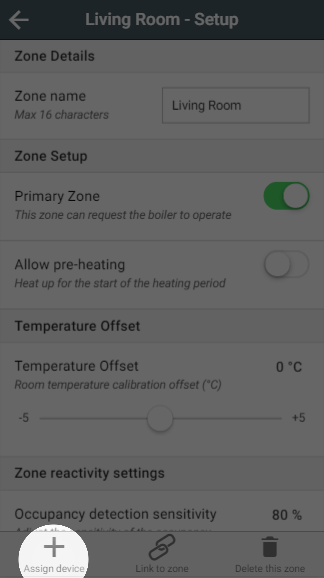
- Find the number of the device you want to assign to the room (this will have been shown on screen during the inclusion process, or on a sticker if purchased as part of your original system).
Select the device and click 'Assign'.
 Assign a channel
It is sometimes useful to add a single channel to a zone, rather than the whole device. A channel is a single part of the device, such as the measured temperature.
For example: If you have the My House Thermostat (also referred to as the Whole House Thermostat) in a room that you also have named on the app, you may like to use the Measured Temperature in the room that it is located in as well as in 'My House' where the Room Thermostat is assigned. |
To assign a channel:
- Click on the zone you want to add the channel to.
- Click on the Zone sub-menu and Zone Setup.
- Click on 'Assign device'.
- Click on 'Show details' above the list of devices.
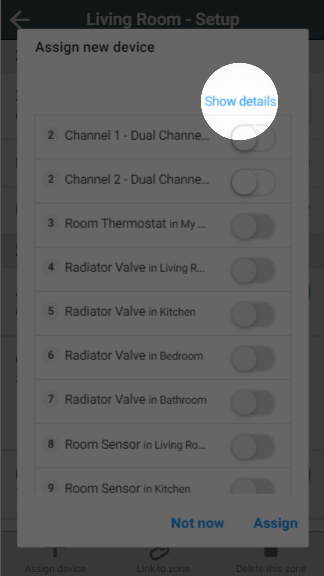
- Find the number of the device you want to assign the channel from (this will have been shown on screen during the inclusion process, or on a sticker if purchased as part of your original system).
Select the channel of the device and click 'Assign'.
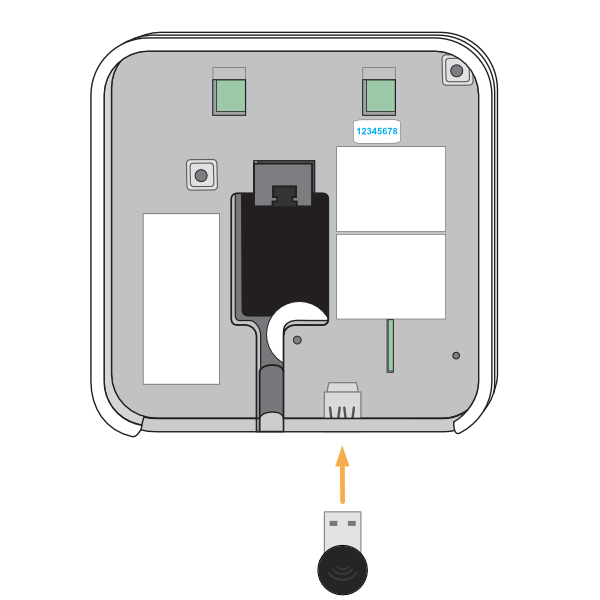
Adding the Communications Adapter
If you are adding a Communications Adapter to an existing Genius Hub, you will need to follow the instructions below before adding the first valve to your system:
- Install the Communications Adapter into the USB port found at the bottom of the Genius Hub.
- If you haven't installed Hub software 6.0.12 or above:
- On the My House page, click on the System Tile
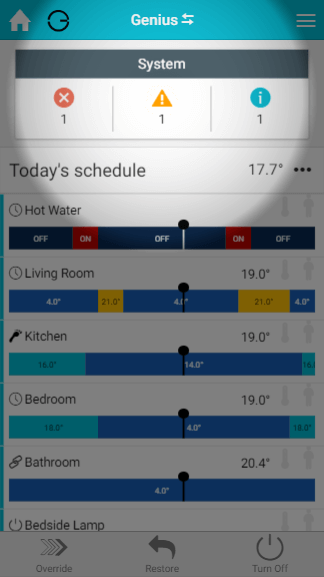
- Follow the instructions under the Blue Circle
") to install the latest software
to install the latest software
- If you have installed the latest Hub software:
- In the app, click on the Main Menu
- Select 'Settings'
- Choose 'System'
- Tap on ‘Restart Hub’ in the Quick Actions Bar
- Click 'Restart'
- The Communications Adapter will be brought online with the Genius Hub after the restart and you can now add Genius Radiator Valves, as per the instructions above for how to 'Add a device'
Preparing your 'Genius Starter Kit' for zoning
If you started your Heat Genius system with a Genius Starter Kit and want to begin adding Genius Radiator Valves to your system, you will need to follow the instructions below before adding the first valve to your system:
- Go to your single 'Heating' zone.
- Click on the sub-menu, followed by 'Zone Setup'.
- Under the list of devices, remove all of the devices from this zone.
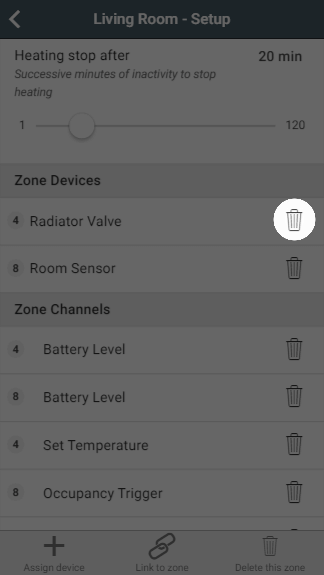
Click on 'Delete this zone' to remove this zone from your system
If you are adding Radiator Valves to only some of your radiators, then you may want to follow these instructions to create a schedule for the uncontrolled radiators. |
- Click on the Home icon to return to the My House page.
- Click on the My House sub-menu, followed by 'My House Setup'.
- In the Quick Actions bar, click on 'Assign device'.
- Select the 'Single Channel Receiver' and 'Room Thermostat', followed by 'Assign'.
Prepare your 'Genius Starter Kit + Hot Water' for zoning
If you started your Heat Genius system with a Genius Starter Kit+ Hot Water and want to begin adding Genius Radiator Valves to your system, you will need to follow the instructions below before adding the first valve to your system:
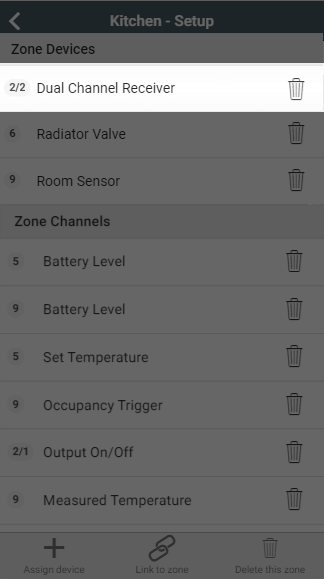
- Go to your single 'Heating' zone.
- Click on the sub-menu, followed by 'Zone Setup'.
- Under the list of devices, make a note of the channel of the Dual Channel Receiver which is assigned to this zone.
- Now remove all of the devices from this zone.
Click on 'Delete this zone' to remove this zone from your system
If you are adding Radiator Valves to only some of your radiators, then you may want to follow these instructions to create a schedule for the uncontrolled radiators. |
- Click on the Home icon to return to the My House page.
- Click on the My House sub-menu, followed by 'My House Setup'.
- In the Quick Actions bar, click on 'Assign device'.
- Select the 'Dual Channel Receiver' channel which was previously assigned to 'Heating' and 'Room Thermostat', followed by 'Assign'.
Adding the 'Hot Water Time and Temperature addon' to your system
If you started your Heat Genius system with a Genius Starter Kit+ Hot Water and want to begin controlling the temperature of your Hot Water tank with an Electric Switch and Temperature Probe you will need to follow the steps below:
- Follow instructions in the Doctor to include 'Hot Water Time and Temperature addon' onto the system, making a note of the device ID number.
- To create the Boiler-fed Hot Water Zone:
- Go to your 'Hot Water' zone.
- Click on the 3 dots, followed by 'Zone Setup'
- Remove the Dual Channel Receiver channel from the zone, making a note of the device ID number and channel number.
- Delete the 'Hot Water' zone.
- Create a new zone of the type 'Hot Water Temperature'.
- Add the Dual Channel Receiver channel, removed from the old Hot Water zone, above.
- Add in the 'Temperature' channel from the newly assigned device (in step 1).

- If you are also using your Hot Water Time and Temperature addon to control an Immersion Heater:
- Create a new zone of the type 'Hot Water Temperature'.
- In this zone, click on the 3 dots, followed by 'Zone Setup'
- Assign the Hot Water Time and Temperature addon added in Step 1