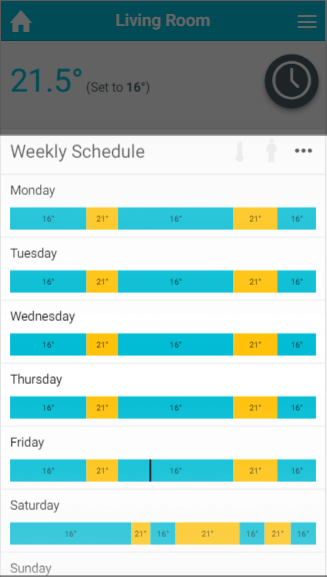
In Timer mode, you can set up a 7-day schedule to control the heating in this zone. You set up a ‘heating period’ to suit your needs, including start time, end time and temperature. At the start of the heating period, the Genius Hub system will activate the heating in the room. Once the room has reached the set temperature, the system will maintain the temperature for the duration set.
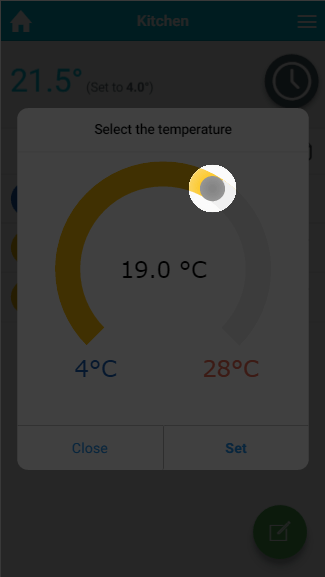
The main difference between Timer mode in Radiator, Underfloor heating or Hot Water Temperature zones compared with On/Off zones is that you can set a temperature for these types of zone. In On/Off zones you can only set periods where the heating is on or off.
To view the schedule for any zone:
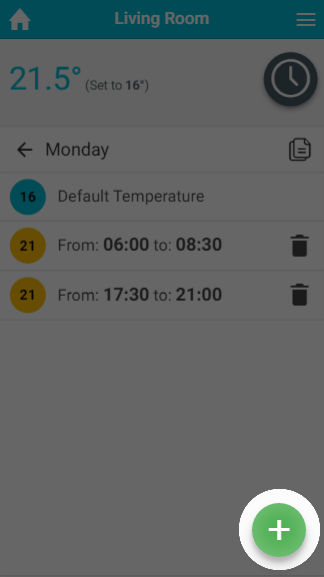
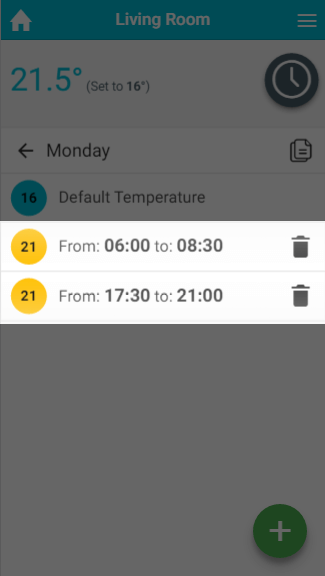
If you wish to view a day's schedule in more detail, click on the day you wish to view. This will load the details of the heating schedule including the default temperature and a list of the heating periods.
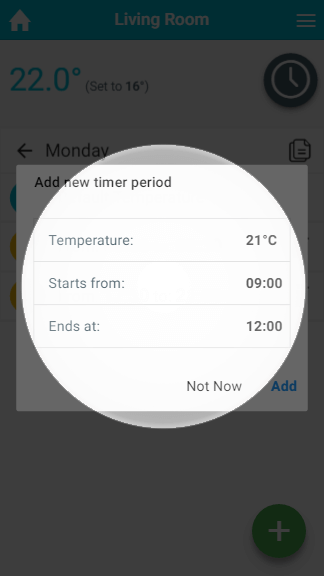
With the Genius Hub system you can set as many heating periods as you require throughout the day.
Each timer period must be a minimum of 5 minutes, however there are no other limits on the number of periods you can create. |
To add a timer period for a heating zone:
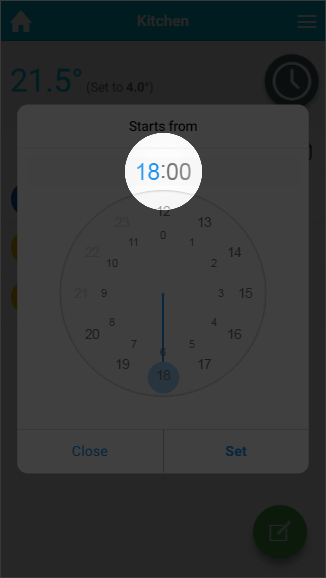
Select when the heating period should begin, by first clicking on the hour the heating period will begin.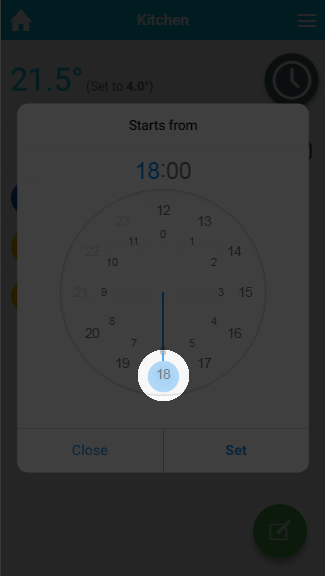
Next click on the minutes the heating period should begin, followed by Set.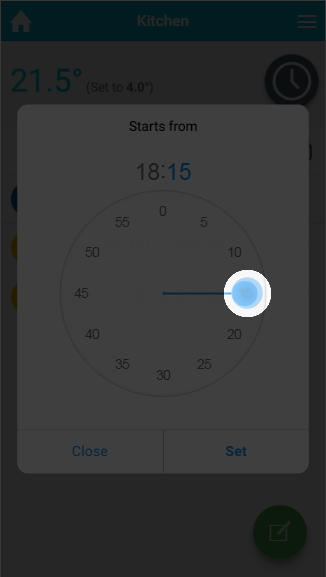
If you want to change the hours the heating period starts at, click on the hours at the selected time. |
For an On/Off zone you only need to select the start and end time of the On period you are creating. |
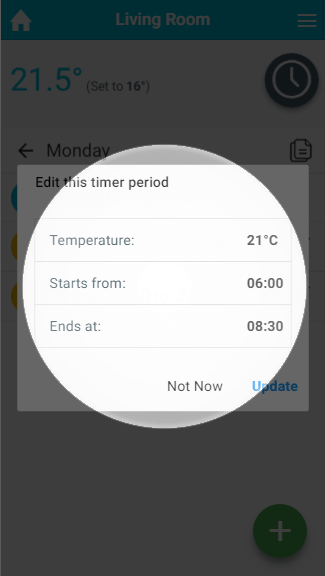
If your schedule changes or the temperature in a room is not right for you, it is easy to change a Timer period.
To change a Timer period:
If your schedule has changed significantly, you may wish to delete a Timer period.
To remove a Timer period for a zone:
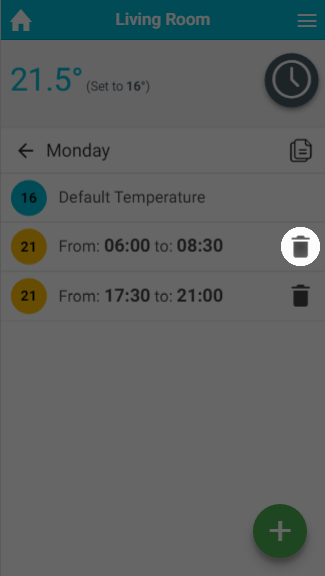
There is no way to recover a Timer period, so ensure you are deleting the right one. |
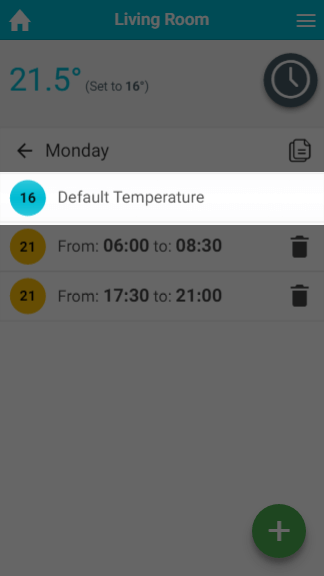
For those times of day which you do not want the heating on high, you can set a default temperature, so that the room doesn't cool down too far, leaving you to return to a cold house or causing the room to take a long time to heat up again.
The default temperature can be set for each day of each zone. To do this for heating zones:
Default temperatures are especially important with underfloor heating which can take a number of hours to reach the desired temperature. The reason for this is because if the floor gets too cold then it takes a very long time to warm up such as large mass, compared with a metal radiator. It is recommended that a default temperature of no less than 4°C below the normal heating temperature is selected. We also recommend you use Pre-Heat for Underfloor Heating zones. |
There is no configurable Default setting for On/Off zones. The zones are off by default and the Timer periods are always On.
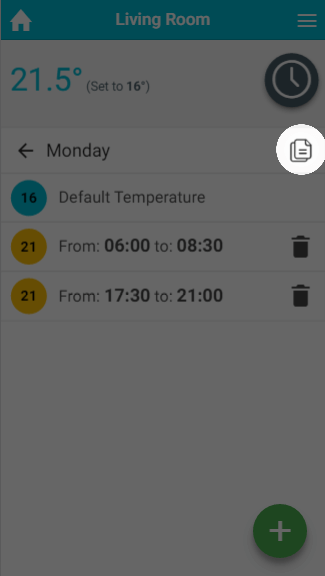
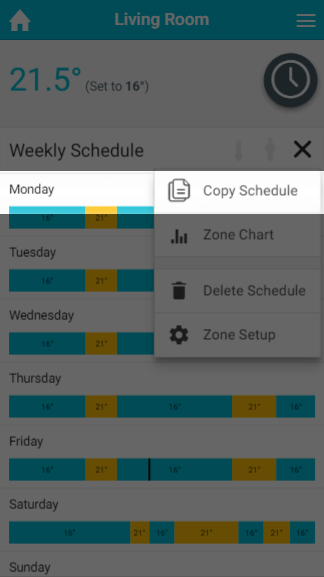
Once you have set up the schedule for one day, it is easy to copy the schedule to another day. This can be very useful if you have a regular schedule, such as if you work regular hours on a number of days in the week.
To copy the schedule from one day to another:
After setting up the schedule for one zone, you may find it easier to copy the schedule from this zone to another one and adjust it. This is often the case if you have multiple bedrooms in the property for example.
To copy the schedule from one zone to another:
|
There is no way to recover a schedule once it is overwritten, so ensure you select the right zone(s). |
If your schedule has changed significantly, it may be easier to clear all the schedule for all of the zone and start again by adding new Timer periods.
To delete the entire schedule for a zone:
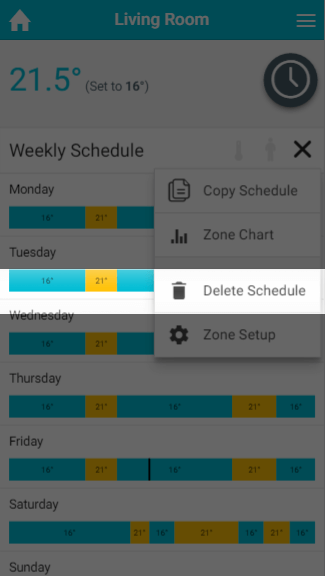
There is no way to recover a schedule once it is deleted, so ensure you have selected the right zone. |
An alternative way to schedule the heating in your home is to activate Pre-heat from the Zone Setup.
If you want to enable Pre-heating, please see the 'Setup pages' chapter.