When you click on a zone, the zone page loads. From this page you can:
- See the current temperature and heating in the zone.
- Change the mode of the zone by clicking on the mode selector button on the at the top right of the page (under the menu).
- See the weekly schedule / current settings for the zone.
- Access the zone sub-menu for more features and settings.
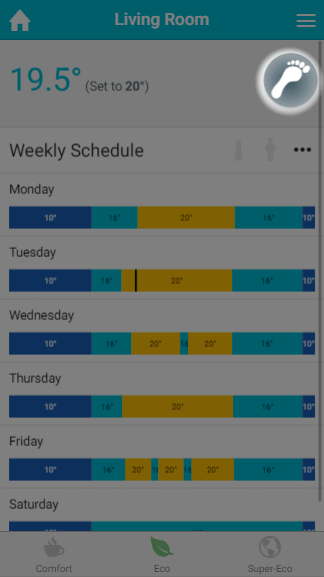
Current temperature and heating
On the left hand side of the zone pages (in the grey area) up to 2 pieces of information can be displayed:
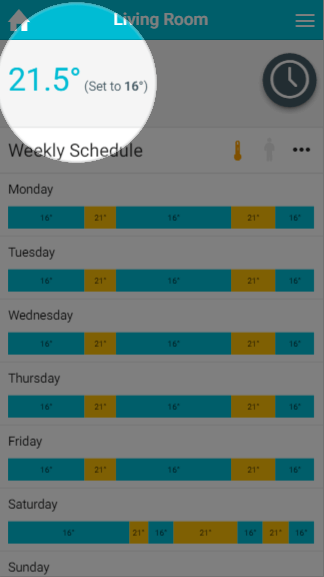
- The measured temperature: This is the current temperature in the zone, and is displayed if the zone has a device which feeds the temperature back to the app (such as a Room Sensor or Thermostat).
- The colour of the measured temperature is an indicator as to whether the zone is calling for heat. If the temperature is blue, the zone is up to temperature and not calling for heat. When the measured temperature is orange, the zone is trying to heat up and so calling for heat (or on if it is an On/Off room).
- The set temperature: The temperature the zone is currently controlling to.
- For an On/Off zone, this will display whether the zone is currently on or off.
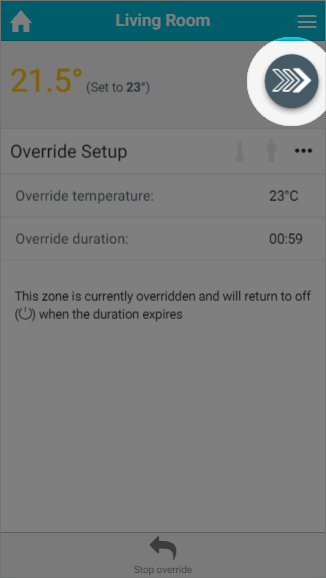
Mode selector
The mode selector allows you to easily change the mode of a zone.
To change the heating in the zone:
- The current mode icon is always displayed in the mode selector.
- To change mode, click on the mode selector and the other available modes will be displayed. Click on the mode you wish to change the zone to and the page will update.
If you wish to stay in the current mode, just select the smallest icon on the right hand side of the mode and the mode selector will close.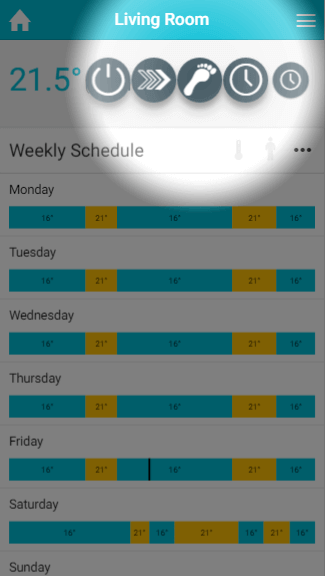
To find out more about each of the modes available, see the relevant chapter.
Activity icons
Directly underneath the mode selector are 2 activity icons, which are:
![]()
- The pre-heat symbol: This symbol will light up when the room is heating due to the pre-heat settings, and greyed out otherwise. For more information on pre-heat, please see the later chapter.
- The occupancy symbol: This symbol will change when occupancy is detected, and changes in different ways depending on the mode of the zone.
- When zones are in Footprint mode, the occupancy icon is greyed out when there is no occupancy, follow when occupancy is detected but there is not enough occupancy to call for heat and solid when the room is being heated duye to the occupancy being detected.
- In all other modes, the occupancy will be greyed out when there is no occupancy detected and hollow when occupancy is being detected in that zone.
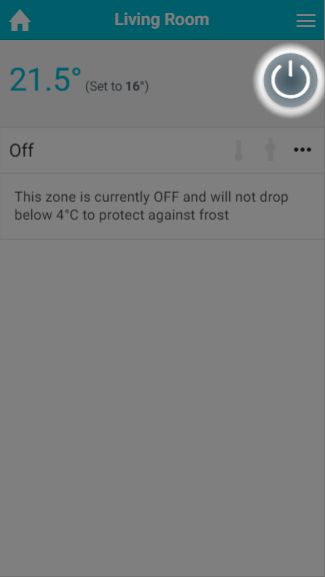
Current settings / schedule
The detailed information for the zone is displayed under the mode selector. This changes based on the mode you have selected and the type of zone you are viewing. The main displays are:
- Off mode: For radiator zones, this puts the system into frost protect whereby the heating will only turn on for that zone if the measured temperature drops below the temperature displayed in the on-screen message. For On/Off and TPI Zones, this will turn the zones off and they will no longer call for heat under any circumstances.
- Timer mode: The heating in the zone will follow a chosen schedule, as shown in the timer bars. You can change this schedule to suit your circumstances on a zone-by-zone and day-by-day basis. The settings you can choose from differ based on the type of zone you are viewing. To change the schedule for any day, click on the timer bar for the day you want to adjust.
- Footprint mode: In this mode the system will heat the zone based on whether the zone is normally used at this time, and if there is anyone currently using the zone. The timer bars are not clickable in this mode as the schedule is automatically created by your Genius Hub.
- Override mode: This mode allows you to temporarily adjust the heating in the zone, by setting an override of a set temperature and duration. For On/Off zones, override switches the zone on for the duration set.
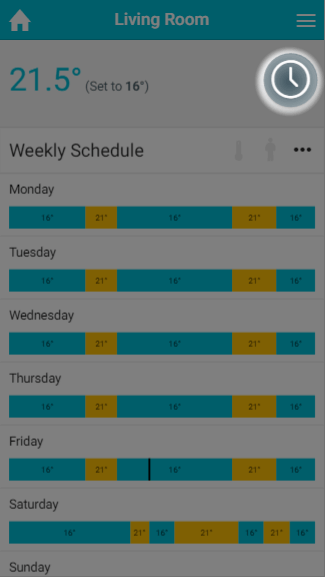
Zone sub-menu
On the right hand side of the Current schedule / settings title bar is the zone sub-menu. The sub-menu provides options to access other pages related to the one you are currently viewing, perform quick actions or change the setup of the zone you are viewing.
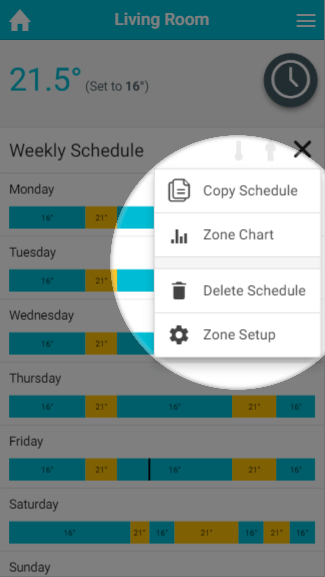
The standard options on the zone sub-menu are:
- Zone Chart
- Zone Setup
More options may be displayed depending on the mode is active for the viewed zone. These will be described in the chapter for the relevant mode.
Zone Chart
The chart pages display the historical heating and occupancy data for the zone you are viewing. For more information, please see the chapter on 'Viewing your Heating History'.
Zone Setup
Setup pages allow you to change the configuration of a zone, such as its name, what devices are assigned to it and enable extra features such as pre-heating. For more information, please see the chapter on Setup pages.