| Status | ||||
|---|---|---|---|---|
|
In Timer Sense mode, you can set up a 7-day schedule to control the heating in this zone, in a similar manner to Timer mode. You set up a ‘heating period’ to suit your needs, including start time, end time and temperature. At the start of the heating period, the Genius Hub system will activate the heating in the room. Once the room has reached the set temperature, the system will maintain the temperature for the duration set., temperature, along with whether you want the period to switch on regardless or only when someone is in the zone.
IMAGE HERE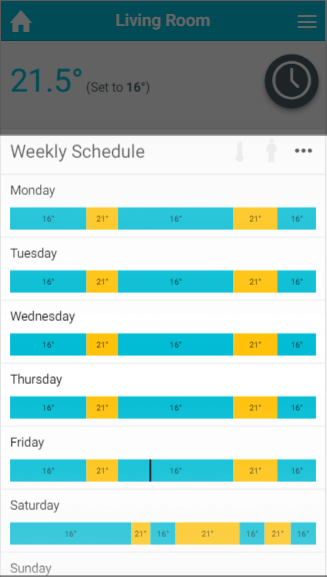
The main difference between Timer mode in Radiator, Underfloor heating or Hot Water Temperature zones compared with On/Off zones is that you can set a temperature for these types of zone. In On/Off zones you can only set periods where the heating is on or off.
| Note |
|---|
Sense mode is only available in zones with a Room Sensor, or Occupancy Trigger channel assigned to them. |
To view the schedule for any zone:
- From the My House page, click on the zone you wish to view.
- Ensure the zone is in Timer mode.
Periods which will react to occupancy are shown by an underline on the timerbars, and indicated by a man symbol next to the times and temperature when editing timer periods.
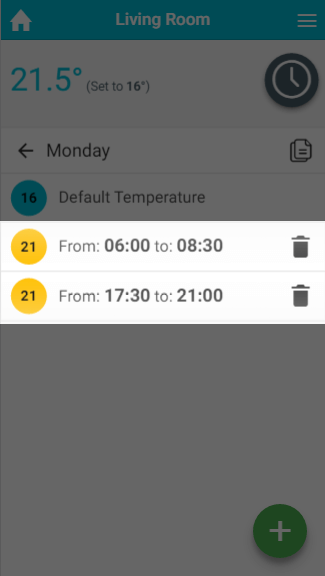
If you wish to view a day's schedule in more detail, click on the day you wish to view. This will load the details of the heating schedule including the default temperature and a list of the heating periods.
...
- From the My House page, click on the zone you wish to view.
- Change the zone to Timer mode.
- Click on the first day to have a schedule added.
- Click the floating add heating period button found at the bottom-right of the page.
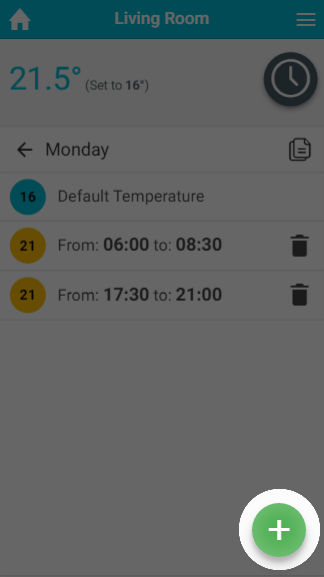 IMAGE HERE
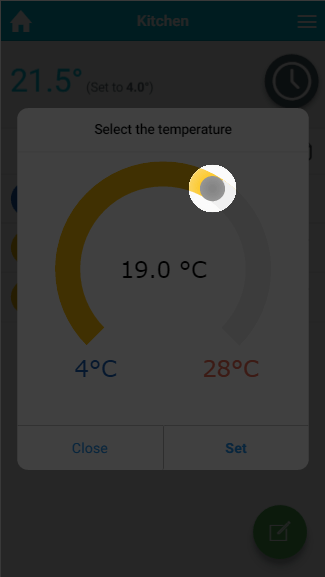
 - To select the temperate, drag the slider to the correct temperature, then click Set.
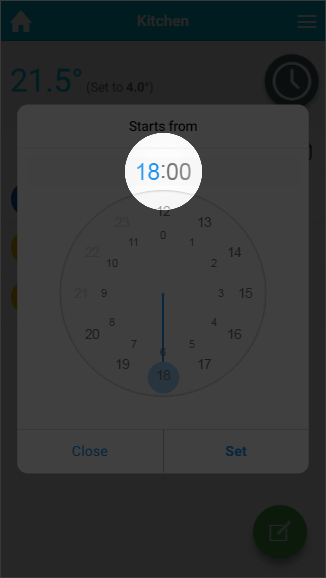
Select when the heating period should begin, by first clicking on the hour the heating period will begin.
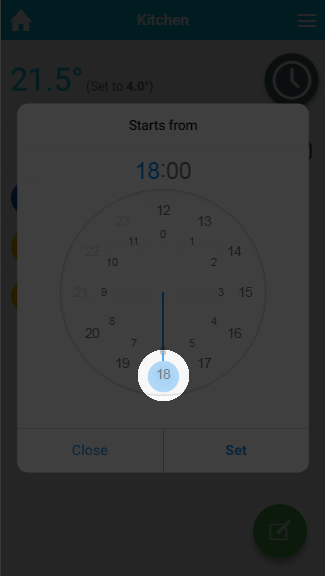
Next click on the minutes the heating period should begin, followed by Set.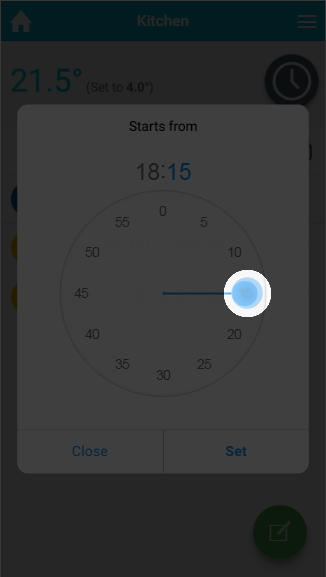
Info If you want to change the hours the heating period starts at, click on the hours at the selected time.
- Select when the heating period should finish.
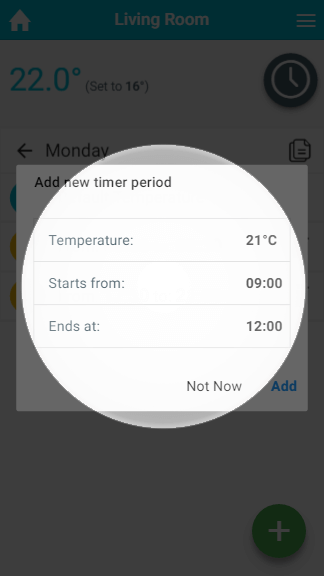 Click OK. IMAGE HERE
 - Choose whether you want the period to heat up the same as Timer mode (purely to the schedule), or if you only want the heating period to heat up if there is occupancy detected during that period.
| Info |
|---|
For an On/Off zone you only need to select the start and end time of the On period you are creating, the period will automatically be set to 'ON', and this cannot be changed. |
| Anchor | ||||
|---|---|---|---|---|
|
...
- From the My House page, click on the zone you wish to edit.
- Ensure the zone is in Timer mode.
- Click on the day you want to change the schedule of.
- Click on the Timer period you want to change.
- Click on the relevant option you want to change, e.g. the end time.
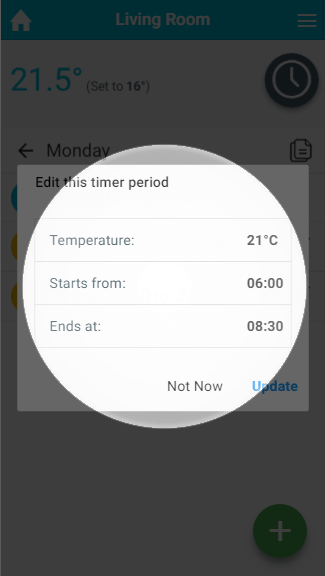 IMAGE HERE
 - Change the option to its new setting.
- Click OK.
...
- From the My House page, click on the zone you wish to edit.
- Ensure the zone is in Timer mode.
- Click on the day you want to change the schedule of.
- Next to the Timer period you no longer want, click on the 'Bin' icon.
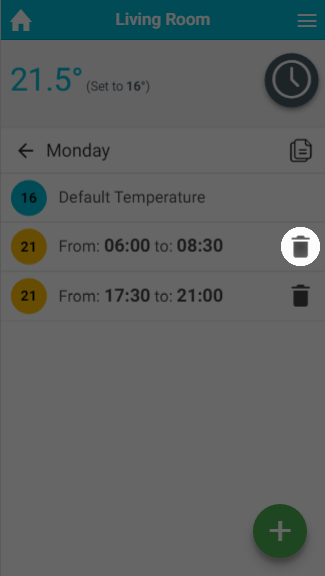 IMAGE HERE
 - In the confirmation dialog, click 'Delete'.
...
For those times of day which you do not want the heating on high, you can set a default temperature, so that the room doesn't cool down too far, leaving you to return to a cold house or causing the room to take a long time to heat up again. . Default periods cannot be reactive. If you want a zone to react throughout the day, you will need to create timer periods to cover all of the 24 hour period.
The default temperature can be set for each day of each zone. To do this for heating zones:
- From the My House page, click on the zone you wish to edit.
- Ensure the zone is in Timer mode.
- Click on the day which you want to change the default temperature.
- Click on the Default temperature entry at the top of the list of heating periods.
 IMAGE HERE
 - Change the default temperature and click Set.
...
There is no configurable Default setting for On/Off zones. The zones are off by default and the Timer periods are always On.
...
Once you have set up the schedule for one day, it is easy to copy the schedule to another day. This can be very useful if you have a regular schedule, such as if you work regular hours on a number of days in the week.
To copy the schedule from one day to another:
- From the My House page, click on the zone you wish to view.
- Ensure the zone is in Timer mode.
- Click on the day which you want to copy the schedule from.
- Click on the copy icon on the top right of the page, underneath the mode selector.
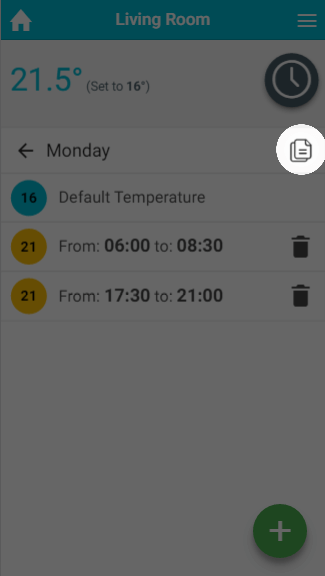
- Select the days to copy the schedule to.
- Click 'Copy'.
Advanced options
...
After setting up the schedule for one zone, you may find it easier to copy the schedule from this zone to another one and adjust it. This is often the case if you have multiple bedrooms in the property for example.
To copy the schedule from one zone to another:
- From the My House page, click on the zone you wish to copy the schedule from.
- Ensure the zone is in Timer mode.
- Click on the zone sub-menu and click 'Copy Schedule'.
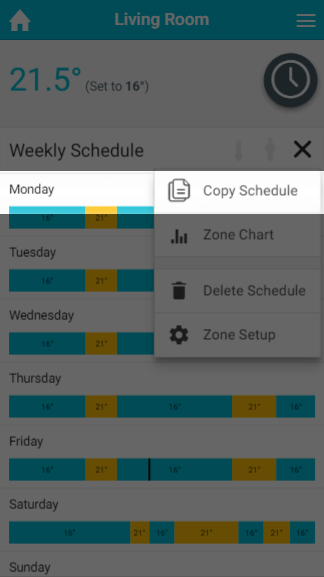
- Select the zones you want to copy this rooms schedule to
- Click 'Copy'.
| Info |
|---|
|
| Note |
|---|
There is no way to recover a schedule once it is overwritten, so ensure you select the right zone(s). |
...
If your schedule has changed significantly, it may be easier to clear all the schedule for all of the zone and start again by adding new Timer periods.
To delete the entire schedule for a zone:
- From the My House page, click on the zone you wish to delete the schedule of.
- Ensure the zone is in Timer mode.
- Click on the zone sub-menu and click 'Delete Schedule'.
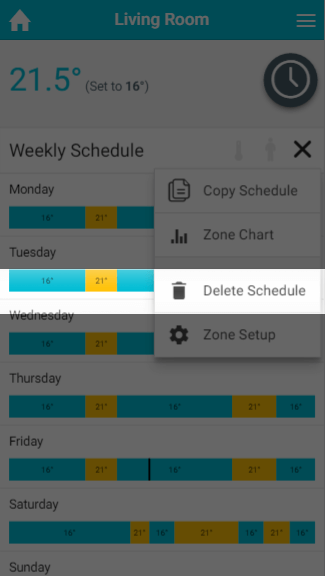
- In the confirmation dialog, click 'Delete'.
| Note |
|---|
There is no way to recover a schedule once it is deleted, so ensure you have selected the right zone. |
Pre-heating
An alternative way to schedule the heating in your home is to activate Pre-heat from the Zone Setup.
- If pre-heating is disabled: The system will start heating the zone at the start of a Timer period, which will often mean the zone is below temperature for the first 30 minutes whilst the room heats up.
- If pre-heating is enabled: The system will calculate how long it takes for a room to reach the set temperature and start the heating that much earlier than the start of the Timer period. This means that the heating will start up before the beginning of the Timer period but the room will be warm for the entirety of the Timer Period.
...
Advanced options
For the following options, see the relevant sections of Timer Mode:
- Copy to Another Day
- Copy to Another Zone
- Delete Schedule
- Pre-heating
| Panel | ||||||||||||||||||||
|---|---|---|---|---|---|---|---|---|---|---|---|---|---|---|---|---|---|---|---|---|
| ||||||||||||||||||||
Related Information:
|
...