| Solution id | ||||
|---|---|---|---|---|
|
The following explains how to add a new Single Channel Receiver to a Genius Hub.
| Warning |
|---|
If you have an existing Single Channel Receiver it will need to be excluded from any other network before it is connected to a Genius Hub. |
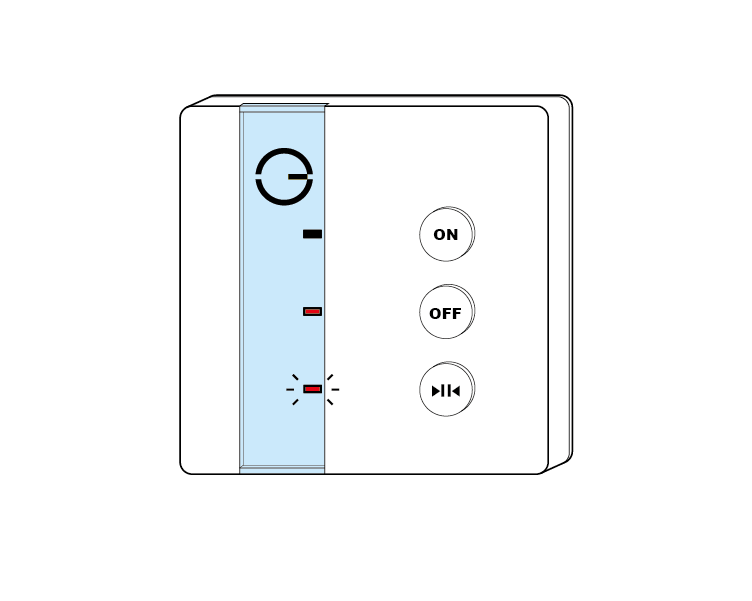
| Troubleshooting step |
|---|
Power on the Single Channel Receiver within direct range of the Genius Hub (either in the same room as each other, or adjacent rooms). If the devices are not close enough together, then use either of the following steps: 1. Move the Genius Hub closer to the Single Channel Receiver. The Genius Hub must have power and an Internet connection. This can be done by: a) Using a long Ethernet cable b) Plugging the Hub into a different Ethernet switch c) Using a Power Line Ethernet adaptor or WiFi booster which has an Ethernet port (see this link for how to connect the hub with a power-line Ethernet adaptor) 2. Temporarily wire the Single Channel Receiver to a plug and short piece of flex so you can power on the Single Channel Receiver next to the Genius Hub. It is recommended that this is done by an electrician/heating engineer.
|
| Troubleshooting step | |||||||||
|---|---|---|---|---|---|---|---|---|---|
Now the Genius Hub needs to get ready to add the device.
|
| Troubleshooting step | |||||||||||
|---|---|---|---|---|---|---|---|---|---|---|---|
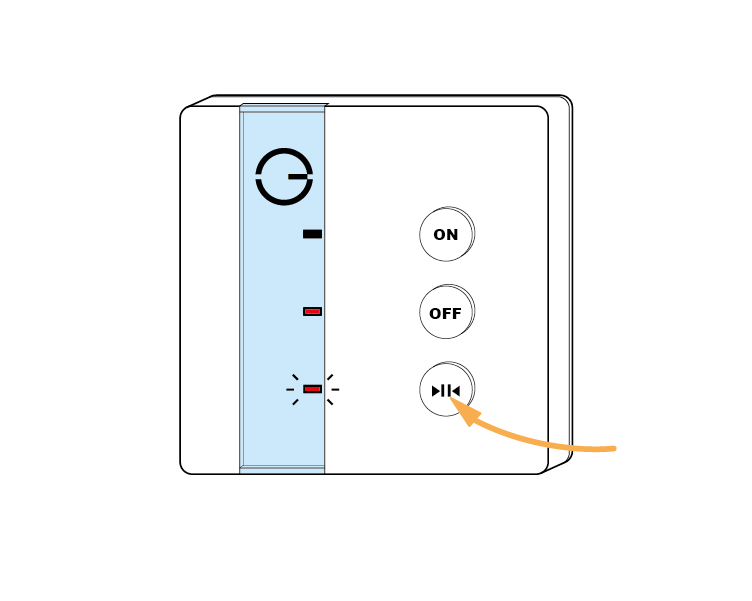
Press & hold the bottom (>||<) button.
The bottom red light stops flashing and the top green light will flash briefly. The 'Off" light turns red when the device has included successfully.
On success, the Single Channel Receiver has been assigned a number, write this number on the side of the device.
|

| Troubleshooting step | |||||||||||
|---|---|---|---|---|---|---|---|---|---|---|---|
Now pick a zone to assign the Single Channel Receiver to.
|
| Troubleshooting step | |||||||||
|---|---|---|---|---|---|---|---|---|---|
|
| Troubleshooting step | |||||||||||
|---|---|---|---|---|---|---|---|---|---|---|---|
|
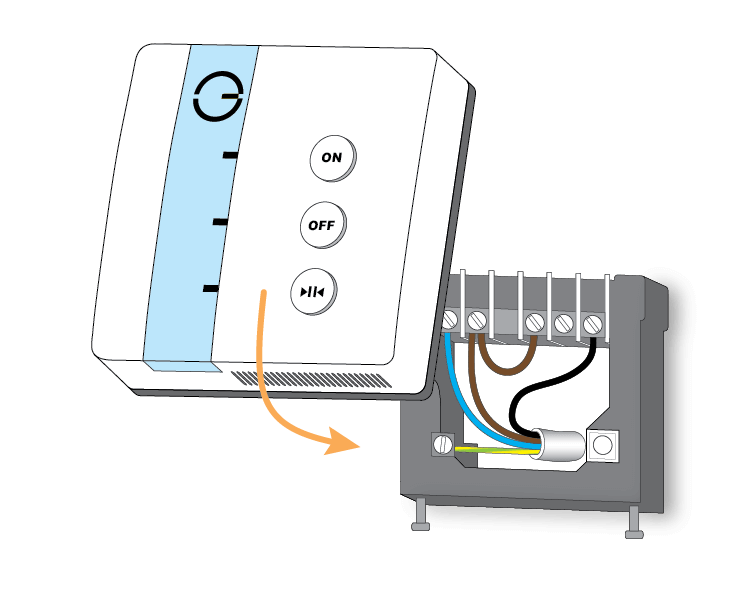
| Troubleshooting step |
|---|
Install the Single Channel Receiver in its final location and wire it accordingly. |