| Solution id |
|---|
| IssueDesc | The Doctor says: The existing Wireless Room Thermostat needs to be included |
|---|
| ID | 16 |
|---|
|
The following explains how to re-add an existing Wireless Room Thermostat to a Genius Hub.
...
| Warning |
|---|
If you have an existing Room Thermostat it will need to be factory reset before it is connected to a Genius Hub. See here for how to factory reset a Room Thermostat. |
Remove the thermostat from its backplate by loosening the two screws at the bottom of the backplate.
 Image Removed
Make sure that the Room Thermostat |
...
is within 2 meters (line of sight) of the Genius Hub (the part that is connected to your |
...
Internet router). If the devices are not close enough together, then use the following steps: 1. Carefully remove the Room Thermostat from its backplate by loosening the two screws at the bottom of the backplate. 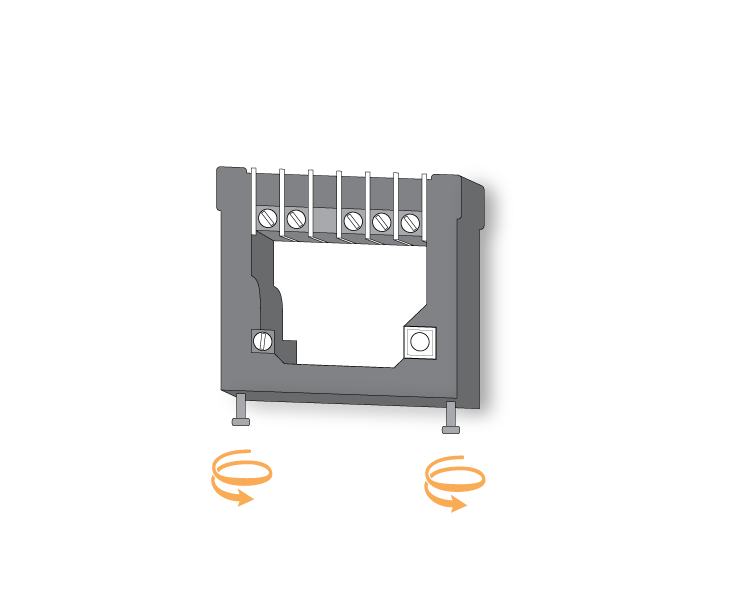 Image Added2. Move the Genius Hub closer to the Room Thermostat. The Genius Hub must have power and an Internet connection. This can be done by: Image Added2. Move the Genius Hub closer to the Room Thermostat. The Genius Hub must have power and an Internet connection. This can be done by:
a) Using a long Ethernet cable
b) Plugging the Hub into a different Ethernet switch
c) Using a Power Line Ethernet adaptor or WiFi booster which has an Ethernet port (see this link for how to connect the hub with a power-line Ethernet adaptor) Ensure there are new batteries in the Room Thermostat. Turn the thermostat over, so the dial is facing away from you and put the number 1 dip switch (left side) into the UP (on) position. |
...
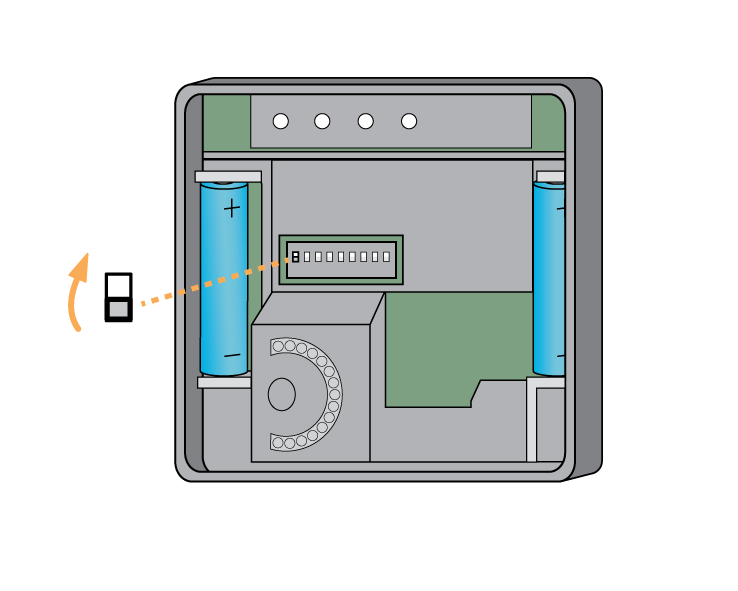 Image Added Image Added
|
| Troubleshooting step |
|---|
Now the hub needs to get ready to add the device. |
...
...
| macro-placeholder |
|---|
| On the app tap on Menu, then Settings and then Devices. Now tap on 'Include device' and follow the prompts on the app. |
|
...
...
...
| Troubleshooting step |
|---|
Turn the thermostat back over so the dial is facing you. Rotate the dial until 'L' is on the screen and press the dial, as a button. 'L' will start to flash. |
...
 Image Added Image Added
After 10 seconds the screen shows 'LP' when the device has included successfully. If 'LP' is not displayed this is not a problem so long as a number for the device is assigned below. |
Image Removed
Turn the thermostat over, so the dial is facing away from you and put the number 1 dip switch into the DOWN (off) position.
Image Removed
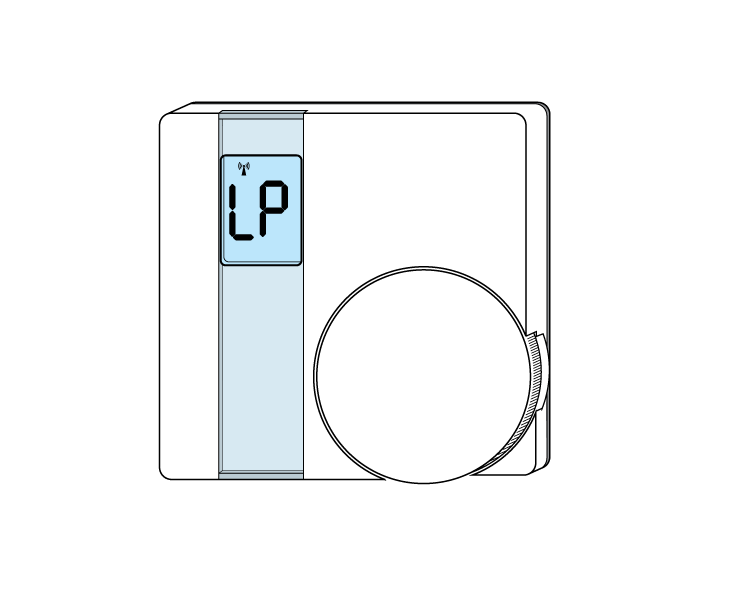 Image Added Image Added
On success, the Room Thermostat has been assigned a number, write this number on the side of the device. |
...
...
| macro-placeholder |
|---|
| Options | device-type="wrt" |
|---|
| MacroName | validate-inclusion |
|---|
| The success or failure of the inclusion will be displayed on the app. |
|
...
...
...
...
...
...
| Troubleshooting step |
|---|
Turn the thermostat over, so the dial is facing away from you and put the number 1 dip switch into the DOWN (off) position. 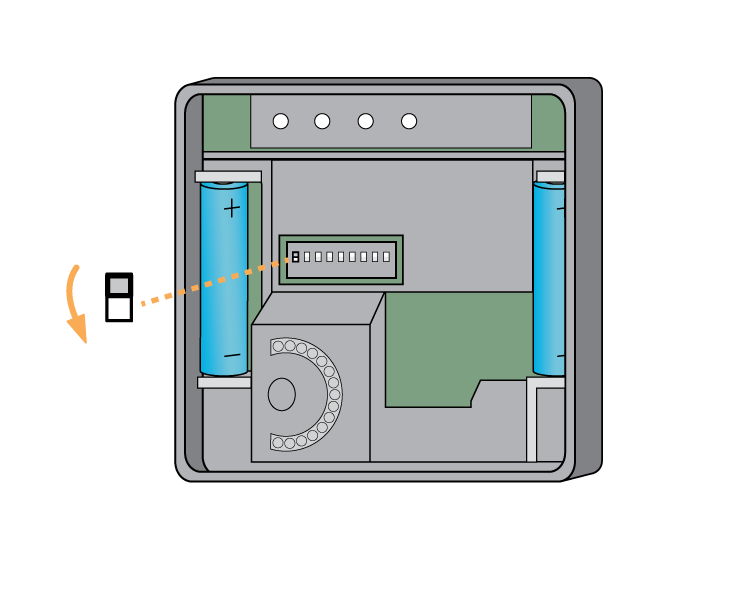 Image Added Image Added
|
...
pick a zone to assign the Room Thermostat to |
...
...
...
Assign the Room Thermostat to a zone. See Chapter 13 of the Manual for information on assigning your device/channel to a zone.
| Z wave buttons placeholder |
|---|
|
*** Assign device to zone ***
| Troubleshooting step |
|---|
You also need to delete the old Room Thermostat from the list of devices as this no longer exists. | Z wave placeholder |
|---|
Remove the old Thermostat from the system. See Chapter 10 of the Manual for information on removing the dead node. |
| Z wave buttons placeholder |
|---|
|
*** Remove the dead node, using the node ID passed through from the start of the wizard if possible *** Do not unplug the Genius Hub for at least 30 minutes so the hub has time to save the new settings. |
...
Tips for locating the Room Thermostat correctly:
• At chest height (so it measures the correct temperature).
• On an internal wall (so it measures the correct temperature and is not affected by being on a cold surface).
...
| macro-placeholder |
|---|
| Options | show-create-new-zone-option allow-user-skip skip-text="Don't assign right now" max="1" filter-on-meta-data="nodeassignable" |
|---|
| MacroName | zone-selector |
|---|
| See Chapter 14 of the Manual for full guidance on assigning the channel to a zone. To create a new zone to assign it to see step 5 otherwise skip to step 6. |
|
| Troubleshooting step |
|---|
| Doctor macro placeholder |
|---|
| See the 'Create new zone' section under Chapter 14 of the Manual for guidance on how to create a new zone. |
|
| Troubleshooting step |
|---|
| Doctor macro placeholder |
|---|
| Options | node-index="0" |
|---|
| MacroName | assign-node |
|---|
| To ensure check the channel has been correctly assigned open the zone's page, tap "Zone Setup" under the menu and check the channel is listed under "Zone Devices". |
|
| Troubleshooting step |
|---|
First locate the Genius Room Thermostat which has been re-added Genius Hub. You need to use the original ID number of the device, and not the one which it currently has. | Doctor macro placeholder |
|---|
| Options | device-type-filter="wrt" max="1" |
|---|
| MacroName | device-selector |
|---|
| The original number of the device may be printed on a sticker on the side of the device |
|
| Troubleshooting step |
|---|
First the Genius Hub needs to attempt to communicate with the Genius Room Thermostat once more. This is to ensure that the device is a 'dead node' and so is eligible to be removed from the system in this way. | Doctor macro placeholder |
|---|
| Options | nodeIndex=0 |
|---|
| MacroName | ping-device |
|---|
| First, ping the device:
Go to the 'Main Menu' and select 'Settings'
Choose 'Devices'
Select the Genius Room Thermostat which you believe to be a dead node
Click on the Device sub-menu (3 dots)
Select Ping and confirm |
Wake up the device by short pressing the top button once.
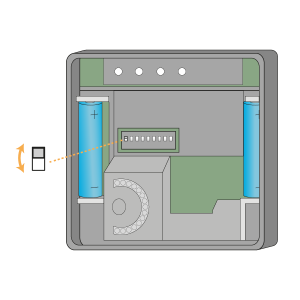 Image Added Image Added
|
| Troubleshooting step |
|---|
Now the device is confirmed as no longer on the system, it can be removed. | Doctor macro placeholder |
|---|
| Options | custom-device-address-parameter="deviceAddresses" |
|---|
| MacroName | remove-dead-node |
|---|
| To remove the dead node:
Select the Genius Room Thermostat which you believe to be a dead node
Click on the Device sub-menu (3 dots)
Select 'Remove Dead Node' and confirm |
|