...
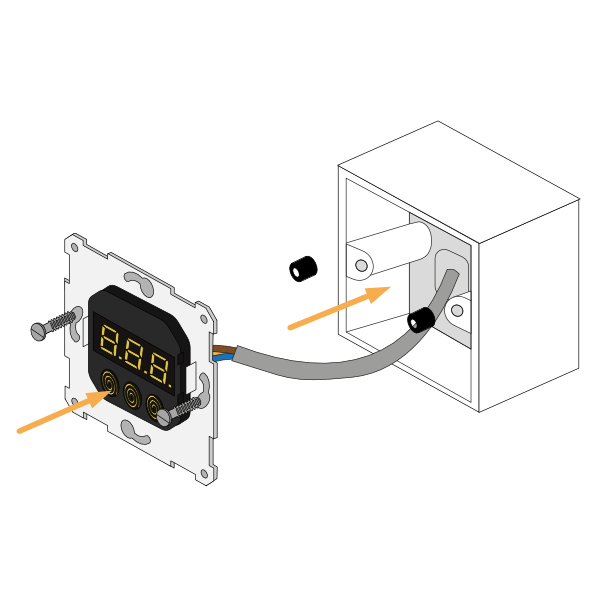
- The Powered Room Thermostat fits into a standard 1-gang pattress, we recommend approximately 40mm deep.
- If you are using a flush mount pattress it should screw in without any problems.
- If you are using a surface mount pattress, you may need to use the 2 spacers to bring the Powered Room Thermostat closer to the edge of the pattress.
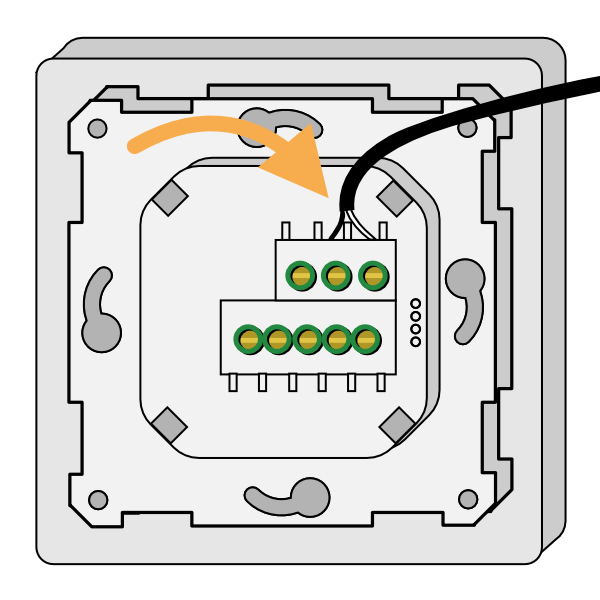
- Wire in the Temperature Probe or link provided into the 'Floor Sensor' terminals. (If using an existing probe, it must be 20kΩ 10kΩ at 25°C)
- Install the pattress into the room the Powered Room Thermostat is going to control.
- If using the floor probe, consider how this is going to get out of the pattress and it will be installed into the floor layer/onto the pipework of the wet underfloor.
- Wire in the mains power and the heating load to the Powered Room Thermostat.
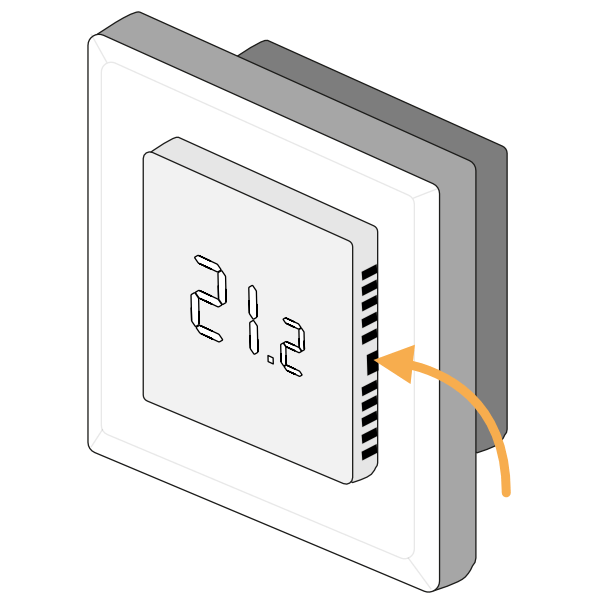
- To screw the Powered Room Thermostat to the pattress, first remove the screen by pushing a small flat-bladed screwdriver into the flat gap on each side of the screen. This will release the 2 spring clamps, and the screen and frame will become loose.
- Screw the Powered Room Thermostat to the pattress. Due to the cutouts to the side of the screen of the PRT, it can either be screwed directly to the pattress, or the screws can be mostly screwed in first and the Powered Room Thermostat placed over the screwheads and rotated.
- See 1.b if using a surface mount pattress, taking care to place the spacers between the device and the pattress.
- See 1.b if using a surface mount pattress, taking care to place the spacers between the device and the pattress.
- Place the frame on the Powered Room Thermostat and push the screen in place to secure the two parts to the main unit, ensuring the logo is at the bottom-left of the screen.
- If using the Floor Probe, fit this into the floor layer before powering on the Powered Room Thermostat.
...